Where Is Software Update on Mac: A Practical Guide
Learn exactly where to find macOS Software Update, how to enable automatic updates, and best practices to keep your Mac secure. Step-by-step instructions, troubleshooting tips, and clear explanations for developers and students.

You’ll find macOS updates in System Settings on macOS Ventura and later (General > Software Update), or in System Preferences on older versions. You can toggle automatic updates in Settings, and you should back up before installing any update. This quick guide shows where to look and how to update safely.
Why Updating macOS Matters
Keeping your Mac up to date is essential for security, stability, and new features. Updates include security patches, bug fixes, and performance improvements that affect both the OS and the tools developers rely on. For someone learning software development, staying current ensures compatibility with the latest SDKs and libraries. According to SoftLinked, regular updates reduce exposure to known vulnerabilities and improve overall reliability. This section explains the rationale behind updating, what kinds of updates you’ll encounter, and how to plan updates around your development work. If you’ve wondered where is software update on mac, you’re about to learn a consistent, reliable locating method that works across recent macOS releases. The predictable path reduces friction and helps you stay productive, whether you’re writing code, studying fundamentals, or exploring new tech skills.
Where to Find Software Update on Mac
Locating the Software Update control is straightforward, but the path changes across macOS versions. On macOS Ventura and later, open System Settings from the Apple menu, then select General, and click Software Update. If you’re on macOS Monterey or earlier, use System Preferences and then click Software Update. The interface label may differ slightly, but the goal is the same: check for updates, review available items, and install. Ensure you have an active internet connection and that your Mac is permitted to check for updates in enterprise or managed environments. Being comfortable with both paths is especially important for developers who may juggle multiple devices or test rigs. In short, the location is predictable once you know which macOS generation you’re using, and this knowledge keeps you in control of your system.
Automatic Updates vs Manual Updates
Automatic updates take the guesswork out of staying current, but you may want more control when testing software environments. In System Settings > General > Software Update, you can enable Automatic Updates so macOS downloads and installs critical security patches while your Mac is plugged in and connected to the internet. Some updates still require a restart, and large feature upgrades may be staged to minimize disruption. SoftLinked recommends enabling automatic updates for essential security patches, while manually reviewing optional features to assess impact on your development workflow. If you’re unsure how updates will affect your toolchain, start with manual updates and enable automatic updates later for ongoing protection. This approach helps preserve a stable development environment while keeping you secure.
How to Access Updates on Different macOS Versions
For users on newer macOS, updates live in System Settings under General > Software Update. On older systems, updates live in System Preferences > Software Update. If you manage multiple Macs, consider creating a small update schedule: one day for macOS updates and another for app updates from the App Store. Having a routine reduces surprise restarts during critical work. Remember that some updates may require you to quit apps or log in again, which is normal and expected. If you’re ever unsure, search for the specific macOS version you’re running with phrases like where is software update on mac, which returns targeted guidance for your screen and language.
Common Pitfalls and Best Practices
Updates can fail or stall for various reasons, including poor internet connections, insufficient disk space, or software conflicts. Before updating, back up your data and ensure you have a reliable power source. SoftLinked’s guidance emphasizes preparation: back up, close unnecessary apps, and verify you can complete the process without interruption. We also recommend reviewing any third-party security software or VPNs that could block the update, and ensuring external drives are disconnected if they’re not needed for the installation. If an update pauses or fails, reboot and retry, and consult the update log for error messages to guide troubleshooting. This cautious approach minimizes data loss and keeps your setup stable for development work.
Tools & Materials
- Mac computer with macOS installed(Ensure it has internet access and admin access if needed)
- Active internet connection(Wired or stable Wi-Fi connection preferred)
- Backup drive or Time Machine(Create a current backup before updating)
- Power source(Keep the Mac plugged in during updates)
- Admin credentials(Needed to authorize installation on some systems)
- Notes on installed development tools(Optional, helps assess compatibility with updates)
Steps
Estimated time: 30-60 minutes
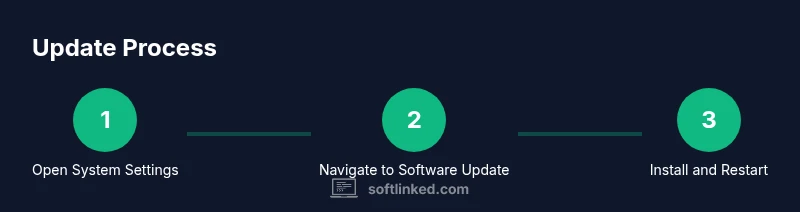
- 1
Open System Settings (or System Preferences)
From the Apple menu in the top-left corner, choose System Settings (macOS Ventura+). On older macOS versions, select System Preferences. This opens the control panel where updates are managed.
Tip: If you can’t locate Settings, use Spotlight (Cmd + Space) to search for Settings or Preferences. - 2
Navigate to General and Software Update
In System Settings, tap General, then click Software Update to check for available macOS updates. If you’re on an older macOS, directly open Software Update from System Preferences.
Tip: If you don’t see updates, confirm your Mac is online and that there are no management restrictions. - 3
Review available updates
Review the list of updates—macOS security patches, feature updates, and firmware improvements. Select the items you want to install.
Tip: Optional updates may improve features but consider testing essential updates first. - 4
Click Install Now (or Update Now)
Click Install Now to begin the process. You may be prompted for your admin password. The download and installation will proceed automatically.
Tip: Save any open work before starting the update to prevent data loss. - 5
Wait for the update to download and install
The duration varies with network speed and update size. Do not interrupt the process; the Mac may restart automatically as part of the installation.
Tip: Keep your Mac plugged in and avoid heavy tasks during this period. - 6
Restart if required
If the update requires a restart, allow the system to reboot and complete the installation. Post-restart, you may see additional configuration prompts.
Tip: Complete any follow-on prompts (e.g., login, privacy settings) to finalize setup. - 7
Verify the update
After the system restarts, return to System Settings > General > Software Update to confirm ‘Your Mac is up to date’. You can also check About This Mac for the OS version.
Tip: Take a quick note of the new macOS version for your records. - 8
Optional: Enable Automatic Updates
If you want future updates to install automatically, enable Automatic Updates in the same Software Update pane.
Tip: Set preferences so critical security patches install automatically while you review feature updates at your own pace.
Your Questions Answered
Where is Software Update located on Mac?
On macOS Ventura and newer, open System Settings > General > Software Update. On older macOS versions, use System Preferences > Software Update. If you don’t see updates, ensure your Mac is online and not restricted by device management.
You’ll find Software Update in System Settings on newer Macs, or System Preferences on older ones. Make sure you’re online if updates don’t appear.
How do I turn on automatic updates?
Open Software Update settings and enable Automatic Updates. This lets macOS download and install critical security patches automatically when your Mac is plugged in and online.
Open the Software Update settings and enable Automatic Updates to let macOS handle critical patches automatically.
Can I update apps without updating macOS?
Yes. App updates from the App Store update independently of macOS. Regularly check both the System Update panel and App Store for the latest versions of tools you rely on.
App updates and macOS updates can happen separately, so check both regularly.
What if updates don’t show up after refreshing?
Verify you’re online, check for any software restrictions, and consider restarting the Mac. If the problem persists, try again later or consult Apple Support resources.
If updates don’t show, recheck connectivity, restart, and try again later, then seek official support if needed.
Is it safe to update on an older Mac?
In general, yes, but older hardware may experience slower performance after major OS updates. Back up first and review release notes for hardware requirements before proceeding.
Older Macs can update safely, but back up first and check hardware requirements for the new OS.
Watch Video
Top Takeaways
- Know the correct path to Software Update for your macOS version
- Back up before starting updates to safeguard your data
- Enable Automatic Updates for security patches when appropriate
- Separate OS updates from App Store updates to manage compatibility
- Troubleshoot patiently if an update stalls or fails