How to Update macOS: A Step-by-Step Guide for 2026
Learn how to safely update macOS with a clear, step-by-step process. This SoftLinked guide covers prerequisites, troubleshooting, and post-update tips for reliable performance on your Mac.

To update macOS, open System Settings > General > Software Update, then click Check for Updates and Install. If prompted, enter your admin password and keep the Mac plugged in during the process. Let the update finish completely, then restart if required and verify the new version in About This Mac, in System Information.
Why updating macOS matters
According to SoftLinked, keeping macOS up to date isn’t just about new features; it’s about security, stability, and compatibility with apps and development tools. Apple releases frequent updates to patch security vulnerabilities, improve hardware drivers, and refine energy efficiency. Delaying updates can leave gaps that attackers may exploit, and can cause incompatibilities with software you rely on for learning or projects. For developers and students, staying current also means you’ll be able to run the latest tools and SDKs without friction. Regular updates help ensure your Mac can run modern compilers, virtual environments, and performance monitoring utilities with fewer surprises. By prioritizing updates, you reduce the risk of sudden crashes and missing support for essential software libraries.
Think of macOS updates as a foundational maintenance task: they keep your system secure, compatible, and fast enough for daily tasks and hands-on learning. SoftLinked’s guidance emphasizes planning updates during times when you won’t need immediate access to your machine, such as a study session or over a weekend. This approach minimizes disruption and maximizes the likelihood of a smooth install.
Prerequisites before you update
Before you start the update, gather a few essentials to minimize risk and downtime. First, create a full backup of your Mac using Time Machine or your preferred backup service. This ensures you can restore data if anything goes wrong during the install. Next, ensure your Mac is plugged into power; a run-down battery can interrupt the process and corrupt the install. Check that you have a reliable internet connection and enough free disk space (ideally 10–20 GB) to download and unpack the update. Close unnecessary apps to protect system resources during installation. Finally, review the update notes from Apple to understand what’s changing and ensure your critical apps will continue to work post-update. If you use a dedicated development environment, consider pausing long-running tasks to avoid interference during the update window.
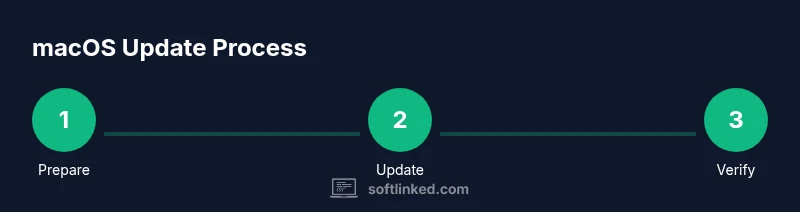
Step-by-step overview
This overview outlines the core stages you’ll follow to update macOS. It’s designed to be read quickly and then implemented in detail in the step-by-step section. You’ll begin with preparation, check for the latest release, download the update, install it, and finally verify success. After verification, you’ll perform a light post-update cleanup to re-enable any paused services and re-check that your essential development tools are functioning properly. The goal is a smooth transition with minimal downtime and maximum compatibility with your current projects and learning goals. A successful update keeps security at the forefront while preserving your data and settings.
Troubleshooting common update issues
Even with careful preparation, issues can arise. If the update stalls at a certain percentage, pause and check your network connection and storage space. Use Disk Utility to verify and repair the disk if needed, and consider restarting the update after a short pause. If the installer reports insufficient space, free up space by removing unused files or moving large media to an external drive. For apps that fail to update afterwards, open the App Store and update them individually, or check for updates from the app publisher. If you encounter kernel panics or repeated reboots, boot into Safe Mode to run a minimal environment, then attempt the update again. When in doubt, consult Apple Support resources for guidance on your specific macOS version.
After updating: verification and cleanup
Once the installation completes and your Mac restarts, verify the update by opening About This Mac and confirming the OS version. Launch frequently used apps to ensure they run without errors and check for any driver or peripheral compatibility messages. If you use developer tools, re-check your environment configurations, SDK paths, and virtualization settings. Re-enable any services you paused during installation and perform a light system check—run a quick disk scan, re-index Spotlight if needed, and ensure iCloud and other sync services are functioning. Finally, review privacy and security settings, including enabling automatic updates where appropriate, for ongoing protection.
Security, privacy, and maintenance after update
Post-update maintenance should include turning on automatic updates to stay protected against future threats. Review new security features introduced in the latest macOS release and adjust privacy settings to your preference, especially permissions for apps and services. Maintain a habit of periodic checks for updates to keep everything current, including development tools and libraries. If you rely on version-controlled work, consider creating a fresh backup after a major OS update to snapshot the system state. The SoftLinked team recommends adopting a regular update rhythm to sustain reliability and performance.
Tools & Materials
- Mac computer(Ensure the model supports the latest macOS version you plan to install)
- Power adapter(Keep the device plugged in throughout the update)
- Stable internet connection(Wired Ethernet is preferred for large downloads when available)
- Backup drive or cloud backup(Create a full backup before updating)
- Admin password / Apple ID credentials(Needed to authorize the update and any app re-authentications)
- Sufficient disk space(Aim for 10–20 GB free space beyond current usage)
Steps
Estimated time: 30-60 minutes
- 1
Prepare for update
Confirm you have a complete backup, plug in the power adapter, and close nonessential apps. Check that you have enough free disk space and reliable internet access. This preparation minimizes the risk of data loss or install interruption.
Tip: Pro tip: start a fresh backup a few minutes before you begin. - 2
Open Software Update
Open System Settings (or System Preferences on older macOS versions), then select General and Software Update. If your Mac uses a different path, use Spotlight to search for 'Software Update' and launch it directly.
Tip: Pro tip: if you don’t see updates, ensure you’re connected to the internet and retry in a few minutes. - 3
Check for available updates
The Software Update panel will display available macOS releases and security patches. Read the update notes to understand what’s included and note any compatibility warnings for your apps or peripherals.
Tip: Pro tip: enable automatic updates after this update to simplify future maintenance. - 4
Download the update
Click Download (or Install if the update is ready). The download progress appears in the Software Update panel. Ensure the download completes without network interruptions.
Tip: Pro tip: use Ethernet when possible for a faster, more reliable download. - 5
Install the update
Follow on-screen prompts to begin the installation. The Mac will likely restart multiple times. Do not interfere with the process; allow it to complete.
Tip: Pro tip: if you’re remotely connected to the Mac, consider delaying long-running sessions until after the install completes. - 6
Restart and complete installation
After the final restart, your Mac may finish some setup tasks in the background. Wait until the desktop is fully responsive and system indicators show normal operation.
Tip: Pro tip: log in with your normal credentials and verify Apple ID permissions after reboot. - 7
Verify the update
Open About This Mac to confirm the new OS version and build number. Run a couple of essential apps to ensure they function correctly and check for any post-install prompts.
Tip: Pro tip: if an app requires an update, install it from the App Store or vendor site to ensure compatibility. - 8
Post-update cleanup
Update any apps, re-index Spotlight if needed, and re-enable services you paused. Consider creating a fresh backup to capture the updated system state.
Tip: Pro tip: enable automatic updates for future OS and security updates.
Your Questions Answered
Do I need to back up before updating?
Yes, always back up before major system updates to prevent data loss if the install encounters a problem.
Yes, back up before updates to protect your data.
What if the update takes too long or stalls?
If the update stalls, check your network connection and disk space, then try again. Restarting the update after a short pause can help.
If it stalls, check connection and space, then retry.
Can I update apps after the OS update?
Yes. After macOS updates, apps may need updates for compatibility. Use the App Store or vendor sites to update essential tools.
Apps may need updates after macOS updates.
Is it safe to shut down during update?
No. Do not shut down during an update; allow the process to complete to avoid corrupting the OS.
Don’t turn off during an update.
How often should I update macOS?
Install updates when available to stay protected and compatible, unless there are known critical issues affecting your setup.
Install updates when available to stay secure.
Watch Video
Top Takeaways
- Back up before updating to prevent data loss.
- Keep the Mac plugged in and use a stable internet connection.
- Verify the OS version after reboot to confirm success.
- Enable automatic updates for ongoing protection.