How to Install Software on Windows 11: A Complete Guide
Learn how to securely install software on Windows 11 with a clear, step-by-step approach. From Microsoft Store to EXE installers, verify sources, handle post-install updates, and troubleshoot common issues.

By the end, you’ll know how to install software in a laptop Windows 11 securely and efficiently. This quick guide covers Microsoft Store apps, EXE/MSI installers, source verification, and essential post-install steps. You’ll also learn common pitfalls, safety tips, and troubleshooting strategies to keep your system stable. Whether you’re a student or professional, these steps simplify setup and maintenance.
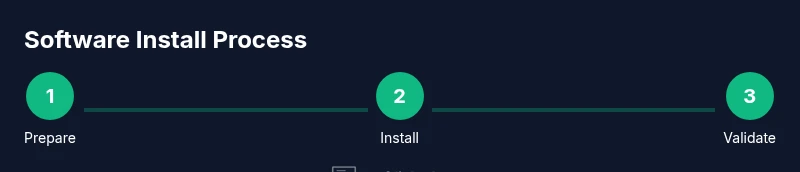
Preparing Your Windows 11 Environment
Before you begin installing any software, set up a safe, reliable baseline on your Windows 11 laptop. The question of how to install software in laptop Windows 11 isn't just about clicking Install; it starts with planning. According to SoftLinked, preparing a clean baseline reduces installation failures and security risks. Begin with ensuring Windows 11 is up to date, enabling System Restore, and validating that your user account has administrator privileges. Create a restore point so you can rollback if something goes wrong. Check your disk space and close unused apps to free resources. Turn on Windows Defender, and configure a firewall to monitor new downloads. If you are using a corporate device, verify that installing new software complies with policy. By establishing a clean baseline, you minimize surprises during the install. The configuration you set now will influence everything from download integrity to how quickly updates install later. As you plan, write down the sources you plan to use and the expected disk impact. This step is about setting up the right conditions for a smooth software installation journey.
Where to Find Software: Stores, Vendors, and Repositories
Windows 11 offers several legitimate pathways to acquire software. The safest route is the Microsoft Store, which screens apps for malware and privacy concerns. When Store apps fail to meet your needs, turn to official vendor sites for EXE or MSI installers, or trusted open-source repositories for portable versions. Always verify the developer by checking the digital signature and the publisher name. SoftLinked analysis shows that users who verify signatures and download from official sources experience fewer post-install issues. If you opt to download from third-party sites, locate direct download links and avoid installers bundled with extra software. Compare versions and read user reviews from trusted sources. Also review the license terms and ensure you understand what data the software collects. For enterprise devices, consult your IT admin to confirm that the software is approved for distribution and configured for your network. This section helps you locate legitimate sources to begin the installation with confidence.
Installing from the Microsoft Store
Installing software from the Microsoft Store is often the easiest and most secure path on Windows 11. Start by opening the Store app from the taskbar or Start menu. Use the search box to find the application you need, then click Get or Install. The Store will download and install the app automatically, handling updates in the background. You may be prompted to sign in with your Microsoft account and grant permission for the store to access your device. After installation, pin the app to the Start menu or Taskbar for quick access. If you encounter a blocked store download, verify your regional settings and ensure the app isn’t restricted by your organization. Store installations are usually sandboxed, reducing the risk of system-wide changes. This pathway is ideal for consumer software and games, and it keeps the system tidy through automatic updates.
Installing EXE and MSI Files Safely
When you download an executable (.exe) or Windows Installer (.msi) file, you take on more control—and more responsibility. Verify the file’s source before running it: check the publisher, file size, and digital signature if available. Right-click the installer and select Run as administrator to grant the necessary privileges. Some installers present options to customize components or install additional software; deselect anything you don’t need to avoid bloatware. Windows User Account Control (UAC) will prompt you to allow changes; only approve changes from trusted programs. During installation, avoid disabling security features unless you are sure of the source. If an installer offers to install extra software or change browser settings, decline those extras. After installation, reboot if prompted and inspect the Start menu for the new application. If you notice unusual behavior or the installer failed, scan the downloaded file with Windows Defender or your antivirus, then re-download from the official source.
Portable apps and ZIP installations
Not all software requires a full installer. Portable applications come as ZIP or 7-Zip packages that you extract and run directly. This can be a quick, clean option for utilities that don’t need system integration. To use portable apps, download the ZIP from the official source, extract to a dedicated folder, and run the executable. Some portable apps offer optional launcher files to streamline updates; keep those in the same folder. Always scan portable downloads with your antivirus before extracting, and verify checksums when provided. If the program requires a registry or system integration, the portable approach may not be suitable. For laptops with limited storage, portable apps can save space and reduce clutter. This route is especially popular for developers testing tools, lightweight utilities, or temporary software needs.
Post-Install Checks: Updates, Drivers, and Validation
After you install software, perform quick checks to ensure it behaves as expected. Check for available updates through the app’s built-in updater or via Windows Update. Some software relies on system drivers or runtime libraries; confirm these components are present and updated. Open the app and go through the initial setup to create a baseline. Review privacy and notification settings to minimize interruptions. If the software integrates with the internet, verify permissions for network access. Consider creating a system restore point again after a successful install. Document the installation details: source, version, date, and any configuration changes. This practice makes future updates easier and helps with troubleshooting.
Troubleshooting Common Install Issues
Even with care, you may encounter problems. Common issues include download corruption, insufficient disk space, or conflicting software. If a download fails, delete the file and re-download from the official site. If an installer stops mid-way, check event logs or the installation log file for error codes. Ensure you have admin rights and that Windows Defender isn’t blocking the installer. If an app fails to start after installation, check compatibility mode, required runtimes (like .NET or Visual C++ redistributables), and user permissions. For corporate devices, group policies or endpoint protection may restrict installations; consult your IT department. Always scan downloads and installers, and avoid promising data access during installs. This section arms you with practical steps to diagnose and recover from typical hiccups.
Security Best Practices and Maintenance
Security should be woven into every installation. Prefer signed installers and verified publishers; avoid leaving default options enabled that install extra software. Enable Windows Defender real-time protection and run periodic scans on new downloads. Use Standard user accounts for daily use to minimize the impact of mis-clicks during installations. Keep Windows 11 itself up to date, as many patches address software compatibility and security risks. Consider maintaining a small library of trusted sources and a routine for checking software licenses. If you routinely install software for development, isolate development tools on a separate disk or virtual environment to limit cross-system impact. This approach helps maintain a clean, secure system and reduces the chance of unwanted software taking root.
Quick-Start Checklist and Next Steps
Use this checklist to start installing software on Windows 11 with confidence:
- Verify Windows 11 is up to date
- Create a restore point
- Choose a trusted source (Microsoft Store or official vendor)
- Download, verify signature
- Run installer with admin rights
- Accept only necessary components
- Reboot if prompted
- Update the app after installation
Tools & Materials
- Windows 11 PC with admin access(Have admin rights to install software and run installers)
- Stable internet connection(At least 25 Mbps; needed for downloads and updates)
- Official software sources(Use Microsoft Store or vendor site; verify signatures)
- Backup method (system restore point or external backup)(Create restore point prior to installation)
- Antivirus/Firewall enabled(Scan downloads and block suspicious installers)
- Checksum verification tools(Optional, helpful for verifying downloads)
Steps
Estimated time: 40-60 minutes
- 1
Update Windows 11
Open Settings > Windows Update and install any pending updates. A fresh patch level reduces compatibility issues with new software. Reboot if prompted to complete the update.
Tip: Keep a backup restore point before major updates. - 2
Create a System Restore Point
In System Properties, create a restore point so you can revert changes if an installation goes wrong. This acts as a safety net during trials with new software.
Tip: Name the restore point with the software you plan to install. - 3
Choose Source Carefully
Decide whether to use the Microsoft Store or a vendor's official site. Verify the publisher and digital signature before downloading.
Tip: If using vendor sites, bookmark the official page to avoid phishing links. - 4
Download the Installer
From Store or vendor, download the installer (.exe/.msi) file to your Downloads folder. Avoid browsers prompting you to install extra.toolbars or software.
Tip: Scan the file with your antivirus before opening. - 5
Run as Administrator
Right-click the installer and select Run as administrator to grant the necessary privileges for installation.
Tip: Only run installers from trusted sources. - 6
Choose Installation Options
During setup, choose the default or Custom installation. Deselect unwanted components to prevent bloatware.
Tip: Pay attention to bundled software checkboxes. - 7
Complete Installation and Reboot
Finish the installer and reboot if prompted. Verify the new app appears in Start Menu and Taskbar.
Tip: Open the app after reboot to confirm it launches properly. - 8
Check for Updates
Launch the app and look for an internal updater, or use Windows Update for system-wide components.
Tip: Enable automatic updates if available. - 9
Validate Features
Go through the initial setup screens, permissions, and privacy settings to tailor the experience.
Tip: Review permissions to minimize data sharing. - 10
Document and Backup
Record the software name, version, source, and install date. Create a fresh restore point if the install was successful.
Tip: Store this in a software catalog for future reference.
Your Questions Answered
What sources are safe for downloading software on Windows 11?
Use Microsoft Store or the official vendor site whenever possible. Verify the publisher name and digital signatures to ensure authenticity and reduce the risk of malware.
Stick to trusted sources like the Microsoft Store or official vendor sites, and always verify signatures before installing.
Why do I need administrator rights to install software?
Installers often modify system files or registry entries. Administrator rights grant necessary permissions, and UAC prompts help protect against unauthorized changes.
Because installers change critical parts of Windows, you’ll usually need administrator rights and permission prompts.
What should I do if an installer prompts to disable antivirus?
Do not disable antivirus protections. If the source is trusted, you can temporarily allow the specific installer after a quick scan. If in doubt, cancel and re-verify the source.
Never disable antivirus for suspicious prompts. Verify the source first, then proceed with caution.
How can I recover if a software installation fails?
Re-run the installer from a trusted source, check for sufficient disk space, and review installation logs. If needed, use a system restore point to revert changes.
If it fails, re-download from a trusted site, check logs, and consider a system restore if things go wrong.
Is it safe to install software from third-party sites on Windows 11?
Only when you have a verified direct download link from a reputable publisher. Avoid sites that bundle extra software or require unnecessary permissions.
Only trust direct, reputable publishers; avoid questionable third-party sites that push extra software.
Watch Video
Top Takeaways
- Verify sources before downloading software.
- Back up and set a restore point prior to installation.
- Prefer Store apps when possible for automatic security updates.
- Run installers with admin rights only from trusted sources.
- Post-install updates and checks prevent future issues.