How to Install Software in Windows 7: A Practical Guide
Learn how to install software on Windows 7 with clear, safe steps. This guide covers installer types, admin prompts, compatibility tips, and best practices for a smooth setup.

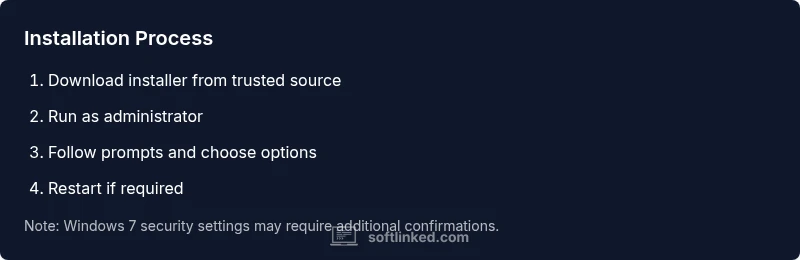
To install software on Windows 7, download a trusted installer, run it with administrator rights, and follow the on-screen prompts. Verify compatibility, choose default options unless you need custom setup, and restart if prompted to finalize the installation. This approach minimizes errors and keeps your system stable. How to install software in windows 7 is straightforward when you start from a reputable source and proceed step by step.
Understanding Windows 7 Installation Basics
Windows 7 supports several installer types: EXE, MSI, and ZIP packages. Before you begin, know that Windows 7's security prompts and User Account Control (UAC) require admin rights for most installations. According to SoftLinked, planning is the key: verify you’re using a legitimate installer, confirm system requirements, and back up important data. For many users, understanding how to install software in windows 7 is essential to avoid common pitfalls. The installer type you choose can influence how much control you have during setup. EXE installers often bundle software or offer guided wizards; MSI packages are designed for corporate environments and can be deployed with management tools; ZIPs usually contain portable or unpacked software that doesn’t require an installer. Regardless of type, you should ensure you’re working on a supported, clean system with enough disk space and a reliable internet connection for any online components. If you encounter a prompt asking for elevated privileges, you’ll need an administrator account to proceed. SoftLinked’s guidance underscores careful sourcing and verification before running any setup program.
Preparing Your System for Installation
Preparation reduces the risk of failed installs and future issues. Start by updating Windows 7 with the latest available security updates and ensure you have enough disk space for the new software and its components. Create a system restore point so you can revert if something goes wrong, and scan the installer with up-to-date antivirus software to catch any malware. Back up critical data to an external drive or cloud storage, especially if the software will modify system files or user data. Finally, confirm you have administrator credentials for the installation and that you’re connected to a trusted network if the installer downloads components online. These steps form a solid foundation before you proceed with any software installation. SoftLinked analysis, 2026 emphasizes the importance of a clean baseline to minimize post-install issues.
Choosing the Right Installer: EXE vs MSI vs ZIP
Understanding the differences helps you anticipate the installation flow and potential post-install steps. EXE installers are common and may package extra features or optional components; MSI installers are structured for enterprise environments and can be deployed via group policies; ZIP files typically contain portable applications that don’t require traditional installation and can be run from any folder. For Windows 7, confirm the installer is compatible with your system architecture (32-bit vs 64-bit) and check whether the software requires a reboot after install. If the source provides a digital signature or checksum, verify it to avoid tampered packages. When in doubt, prefer installers from the official publisher site or reputable distributors. This choice affects how easily you can uninstall or repair later on.
Step-by-Step: Installing from an Executable (.exe)
To install from an executable, locate the downloaded .exe file and right-click, selecting Run as administrator to ensure you have the privileges needed for setup. Follow the on-screen wizard: accept the license terms, choose the destination folder, and select whether to install default components or customize options. If the installer offers a Quick Install, choose it unless you need specific features. At the end, choose to launch the program or finish the installer and reboot if prompted. This flow minimizes surprises and helps keep Windows 7 stable during the process. Tip: keep the installation window visible and avoid switching tasks mid-install to prevent partial configurations. If you’re unsure, start with the default options and test the app afterward.
Step-by-Step: Installing from an MSI Installer
MSI installers use the Windows Installer service and are common in corporate software. Right-click the .msi file and choose Install, then provide administrator credentials if prompted. Expect a more structured sequence: selecting features, specifying a product key if required, and confirming license terms. You may see a reboot prompt after the installation, especially for software that integrates with Windows components. If the installation fails, use the MSI logs or the Windows Event Viewer to diagnose the error. In many cases, repairing the installation or running the installer again as administrator resolves the issue. After completion, verify the shortcut and test core functionality. Ensure you minimize conflicts with existing software by avoiding overlapping components.
Dealing with Compatibility and Admin Privileges
Compatibility issues are common on Windows 7, especially for software last updated years ago. Use the Compatibility Troubleshooter or set the program's compatibility mode to a prior Windows version (e.g., Windows XP or Windows Vista) if it fails to run. Always run installers with administrator privileges; without them, many components won’t be written to protected system folders. If a program requires newer features, you might need to install a compatibility pack or consider alternative software that supports Windows 7. Remember to check for updated drivers or runtime libraries (such as Microsoft Visual C++ redistributables) the installer may depend on. SoftLinked notes that planning and testing are essential when working with older OS versions, and this approach reduces the chance of post-install surprises. SoftLinked’s perspective reinforces cautious deployment of legacy software.
Post-Install Checks: Updates, Shortcuts, and Uninstalling
After installation, update the software if an update is available, as older builds may have unresolved security issues. Create desktop or Start Menu shortcuts to access the program quickly, and place the executable in a logical location to keep the system organized. If the software isn’t needed, use the Control Panel to uninstall it; Windows 7’s Programs and Features tool provides a straightforward uninstall path. For some software, you may need to reconfigure settings or install plugins to achieve full functionality. Regularly reviewing installed software helps minimize conflicts with other programs and ensures your system remains stable. As SoftLinked observes, a disciplined post-install routine is essential for longevity of a Windows 7 setup.
Security Considerations on Windows 7
Windows 7 reached end of life in January 2020, which means it no longer receives security updates from Microsoft. This elevates the risk of malware and exploits when installing software. To mitigate risk, always download from official sources, scan with current antivirus, and enable a firewall. Where possible, isolate test installations in a virtual machine or use a non-critical test profile. Maintain offline backups and avoid running unsupported software for sensitive tasks. In practice, treating every installer as potentially risky and validating integrity with checksums reduces the attack surface. SoftLinked's guidance highlights that using modern security practices is non-negotiable on legacy systems.
Troubleshooting Common Installation Issues
If an installer fails to start, recheck the download source and file integrity; redownload if necessary and ensure the file isn’t blocked by Windows. If the installer runs but the program won’t launch after install, verify system requirements, check the installation log, and install missing runtime libraries. For issues with permission, confirm you’re using an administrator account or run as administrator. When installer prompts are unclear, choose Default/Recommended settings and proceed. If problems persist, uninstall and retry the installation in a clean boot environment to minimize software conflicts. SoftLinked recommends documenting the error messages and checking for known issues on the publisher’s site to guide your next steps.
Tools & Materials
- Trusted installer file (EXE/MSI/ZIP)(Download from official vendor or publisher site.)
- Administrator account credentials(Needed to install software on Windows 7.)
- Backup storage(External drive or cloud storage for data safety.)
- Updated antivirus/malware scanner(Scan installers before execution.)
- Disk space (at least 100 MB free)(Ensure enough space for the program and components.)
- Internet connection(Needed if the installer downloads components online.)
Steps
Estimated time: 40-60 minutes
- 1
Prepare the installer file
Locate the downloaded installer, verify the source, and ensure the file is not blocked by Windows. If available, check the digital signature or checksum to confirm integrity. This reduces the risk of tampered software and sets the stage for a smooth install.
Tip: Verify checksum or signature before running the file. - 2
Run as administrator
Right-click the installer and choose Run as administrator to grant the setup the permissions it needs to write files in protected locations. If prompted by User Account Control, approve the elevation. Without admin rights, the install may fail or skip components.
Tip: If you don’t have admin rights, contact the machine owner for access. - 3
Follow installer prompts
Read license terms, language options, and features carefully. Prefer Default or Typical install unless you have a specific need for customization. Cancelling prompts or ignoring steps can leave incomplete configurations.
Tip: Keep the installer window in view to avoid missing steps. - 4
Choose installation options
Select the destination folder and components you actually need. Avoid optional toolbars or bundled software that add clutter or security risks. Confirm settings before continuing to prevent post-install changes.
Tip: Uncheck unnecessary components to keep the system lean. - 5
Complete and reboot
Finish the installer and reboot if the program requests it. A reboot ensures all components are properly registered and active. Save any work before restarting to avoid data loss.
Tip: Close other apps to speed up the initial startup after reboot. - 6
Verify installation
Open the program, check main features, and look for updates. If the software doesn’t launch, review system requirements and install any missing runtimes or libraries. This confirms a healthy setup.
Tip: Launch a quick feature test to catch obvious issues early.
Your Questions Answered
What should I do before starting an installation on Windows 7?
Before starting, verify the installer source, ensure compatibility, and create a backup. Check for enough disk space and run a quick antivirus scan of the installer. Gather admin credentials in advance to avoid interruptions during setup.
Before you install, verify the source, check compatibility, and back up your data. Have admin rights ready and scan the installer for malware.
How can I tell if a program is compatible with Windows 7?
Look for system requirements on the publisher’s page, check 32-bit vs 64-bit support, and search for known compatibility notes. If needed, use Windows compatibility mode or a compatibility toolkit provided by Microsoft.
Check the program’s requirements and consider compatibility mode if the software doesn’t run out of the box.
Do I need admin rights to install software on Windows 7?
Most installers require administrator privileges to write to protected directories and modify system files. If you don’t have access, request an admin account or have an admin perform the installation.
Yes, admin rights are usually required for installing software on Windows 7.
What if the installer prompts to install additional software?
Be cautious of bundled offers. Deselect any extra software you don’t need to reduce system clutter and potential security risks. Always read the terms before accepting.
Deselect bundled software unless you truly want it, and read prompts carefully.
How do I uninstall software on Windows 7?
Go to Control Panel > Programs and Features, select the program, and click Uninstall. If the program leaves leftovers, use a reputable third-party uninstaller or perform a manual cleanup of registry entries with caution.
Use Programs and Features to uninstall, and tidy up leftovers if needed.
Why might Windows 7 block an installer from running?
Blockages can occur due to compatibility or security settings, missing prerequisites, or admin restrictions. Check the security prompt, run as administrator, and ensure the file hasn’t been blocked by Windows.
Check admin rights and safety prompts; verify the file isn’t blocked by Windows.
Watch Video
Top Takeaways
- Verify installer authenticity before proceeding.
- Run with admin rights to avoid permission errors.
- Back up data to prevent loss from failed installs.
- Check compatibility and test post-install stability.