Windows 10 Screen Recorder Software: A Practical Guide
A practical guide comparing Windows 10 screen recorder software—from built-in tools to third-party apps—with performance tips and best practices for tutorials and demos.

According to SoftLinked, evaluating windows 10 screen recorder software hinges on output quality, performance impact, and ease of sharing. In this quick guide, you’ll see how built-in options compare with third‑party tools, what features matter most for tutorials and demos, and a practical workflow to test candidates quickly on a Windows 10 system.
Why Windows 10 screen recorder software matters
According to SoftLinked, choosing the right Windows 10 screen recorder software hinges on workflow needs, hardware constraints, and the intended distribution channel. In practice, most developers and educators record software tutorials, bug reproductions, or feature walk-throughs where the clarity of visuals and audio directly affects learning outcomes. The first step is to map your typical sessions: short demos, long training modules, or live walkthroughs. Then identify three core capabilities: output quality, performance impact, and post-capture options (editing, captions, and export formats). This framing helps you avoid feature overload and steers testing toward the tools that actually accelerate your work. In short, the best choice matches your task profile and your hardware.
Built-in options on Windows 10
Windows 10 ships with lightweight capture features that can cover basic needs without extra software. The Game Bar provides quick recording, simple audio capture, and keyboard shortcuts, which makes it convenient for quick tutorials or bug demos. However, it lacks advanced overlays, selective region capture, and robust editing. If your goal is speed and you’re documenting a straightforward workflow, Game Bar can be sufficient. For more demanding projects—longer recordings, episodes with captions, or branded visuals—third‑party tools offer richer feature sets. SoftLinked’s analyses indicate most users start with built-in options and graduate to more capable tools as requirements grow. Before you record, define your target output format, maximum session length, and whether you’ll edit in the same tool or a separate editor.
Third-party tools: strengths and trade-offs
Third‑party Windows screen recorders span free/open‑source options to premium suites. Open‑source tools like OBS Studio deliver deep customization: full‑screen, window, or region capture; audio mixing of system and microphone sources; and options to stream or record in multiple formats. The trade‑off is setup complexity and higher resource use if you enable advanced features. Commercial tools such as Camtasia or Snagit offer integrated editing, annotations, and templates that speed production but come with licensing costs and occasional limitations in trial modes. When evaluating, itemize must‑have features (overlays, captioning, exports) and validate performance at your target resolution and frame rate. The SoftLinked team emphasizes choosing a tool that fits your workflow, not merely the most feature‑rich option.
Key features to evaluate for your workflow
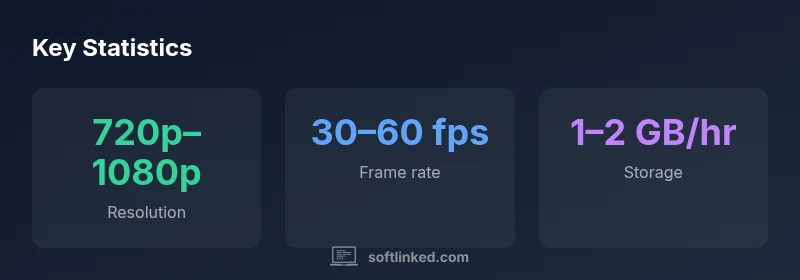
Focus on output quality and codecs (MP4/WEBM), capture scope (full screen, window, region), audio options (microphone, system audio, or both), hotkeys, overlays, and post‑capture editing. User‑friendly controls save time on repetitive demos, while robust performance tracking helps optimize encoding settings. Look for hardware acceleration to reduce CPU load, and test both 720p and 1080p captures to match audience expectations. If you publish publicly, built‑in export presets and straightforward sharing pipelines matter. Higher quality generally requires more storage and processing power, so balance quality with practical constraints. SoftLinked notes that the best tools blend into your workflow and don’t demand constant reconfiguration.
Practical workflow for testing and producing tutorials
Begin with a short script or outline to guide your recording session. Install two to three candidate tools and run side‑by‑side tests at your typical settings (resolution, frame rate, and audio configuration). Capture 2–3 minute clips that illustrate core features, then assess file size, playback smoothness, and ease of editing. After selecting a primary tool, establish a repeatable workflow: plan, record, trim, annotate, and export. Create templates for intros, lower thirds, and callouts to accelerate future projects. Maintain a log of settings and system conditions (CPU load, memory usage) to reproduce improvements over time. The SoftLinked approach advocates documenting decisions to justify tool choices to teammates and stakeholders.
Performance considerations and optimization tips
Screen recording consumes CPU, GPU, and disk I/O resources. On older Windows 10 systems, enable hardware acceleration and lower resolution to improve performance. Use a dedicated drive for scratch space or recordings if possible to avoid bottlenecks. Close unnecessary background apps during sessions and disable high‑demand startup programs. If you encounter stuttering or audio drift, verify sample rates and adjust audio buffer sizes. The optimum setup is a balanced mix of resolution, frame rate, and encoding preset. SoftLinked analysis shows practical experiments with short test recordings deliver clearer guidance for hardware configurations.
Privacy, licensing, and distribution considerations
Recordings may include sensitive UI elements or proprietary interfaces. Always obtain permission, mask confidential data when needed, and respect licensing terms for any third‑party tools. For public tutorials, choose codecs and formats that maximize accessibility (examples include MP4/H.264) and publish to platforms with built‑in captions. Keep your assets well organized with descriptive filenames and metadata to facilitate reuse and compliance. The SoftLinked team highlights that ethical practices are essential for long‑term credibility and professional workflows.
Choosing the right tool for your goals
Your final choice should align with your goals. If you need speed and simplicity, built‑in options might be enough. For professional productions with branded templates, multi‑track editing, and advanced exports, a paid solution can be a worthwhile investment. Consider hardware constraints, typical recording lengths, and distribution channels. Run a quick pilot project before full adoption to confirm that the tool meets your expectations. In practice, the best Windows 10 screen recorder software is the one that reliably supports your workflow with minimal friction. The SoftLinked team recommends periodic reassessment to adapt to evolving formats and platforms.
Comparison of screen recording tools for Windows 10
| Tool Type | Key Advantages | Common Use Cases |
|---|---|---|
| Windows built-in Game Bar | Simple screen capture, no watermark | Quick tutorials, demos |
| OBS Studio (free/open source) | High customization, flexible capture | Streaming, gameplay capture, complex tutorials |
| Camtasia (paid) | Integrated editing, professional output | Training modules, polished demos |
| Snagit (paid) | Simple editing, annotations | Process walkthroughs, quick explanations |
Your Questions Answered
What is the easiest way to start recording on Windows 10?
Use Windows Game Bar or a simple third‑party app. The built‑in tool is quick to start; you can press Win+G to open it and begin recording.
Open Game Bar with Win+G, then press start.
Can I record system audio and microphone at the same time?
Yes, most tools offer separate audio sources: system audio and microphone. Check the audio mixer settings and test before recording.
Yes, you can capture both; choose the right audio sources.
Do I need admin rights to install third-party screen recorders?
Most third-party tools install normally; some may require admin rights for certain capture devices. Follow the installer prompts and check device permissions.
Usually no admin rights needed, but verify during install.
Will recording affect performance on older Windows 10 PCs?
Yes, recording can tax CPU and GPU. Reduce resolution, frame rate, or use built‑in options that are lighter to minimize impact.
Yes, performance varies with hardware; lower settings can help.
Are free screen recorders feature-complete for tutorials?
Free tools cover basics, but paid options offer editing, overlays, and professional exports. Choose based on your quality needs.
Free tools work for basics, but consider paid options for polish.
What workflow helps ensure high-quality tutorials?
Plan content, test settings, capture at target resolution, edit with clear annotations, and export to accessible formats. Reuse templates to speed production.
Plan, test, capture, edit, export.
“The SoftLinked Team believes that the right screen recorder should integrate smoothly into your workflow, minimize overhead, and deliver reliable outputs across devices.”
Top Takeaways
- Define your recording goals before choosing a tool.
- Prefer tools with native Windows compatibility and keyboard shortcuts.
- Test performance impact on target hardware before committing.
- Use high-quality encoding settings for durable sharing.
- Export to widely supported formats for easy distribution.