How to Open a Program When Windows Starts
Learn how to configure Windows startup to automatically open a program. This step-by-step guide covers Startup folder and Task Scheduler methods, plus tips on testing, security, and maintenance for reliable boot-time behavior.

By the end, you’ll have a chosen program launching automatically when Windows starts. You can achieve this via the Startup folder for simple apps or the Task Scheduler for more control (delays, conditions). You’ll need the program’s path, appropriate permissions, and awareness of startup impact on boot times. This approach minimizes manual launches and ensures your essential tools are ready at sign-in.
Why startup automation matters
Automating program launches at Windows startup can streamline your development workflow, reduce repetitive steps, and ensure critical tools are ready the moment you sign in. For aspiring software engineers and students, understanding how to configure startup behavior is a fundamental skill that improves consistency across devices and environments. In this guide, we explore practical methods that work for both personal and work machines, with attention to security, performance, and maintainability. We’ll cover quick-win Startup folder tricks for immediate gains and the more robust Task Scheduler approach for control and scheduling. The goal is to give you reliable options you can adapt as your projects grow, while keeping boot times reasonable and predictable.
Methods overview
There are two primary paths to auto-launch: the quick-start Startup folder and the more controlled Task Scheduler. The Startup folder is ideal for single-user scenarios and lightweight utilities, as it runs your program as soon as you log in. Task Scheduler lets you set triggers, conditions, and delays, which is useful for apps that should start after the system finishes booting or only under certain conditions. We’ll compare the two approaches, highlight when to use each, and provide concrete steps for both. In addition, we’ll touch on security considerations, such as avoiding auto-launch for untrusted software and ensuring startup tasks don’t create unnecessary boot-time overhead.
Method 1: Startup folder (per-user convenience)
The Startup folder is a Windows directory that Windows scans during logon. Any shortcut placed in this folder will trigger the associated program to launch automatically when the user signs in. The path is user-specific, which means each user on a machine can have their own startup items. Before you begin, confirm that the program can run without requiring interactive input at sign-in. If a program requires GUI interaction, it may interrupt the login experience or fail silently. The Startup folder approach is best for utilities that are safe to run without prompts, such as launchers, lightweight dashboards, or monitoring tools.
Method 2: Task Scheduler (granular control)
Task Scheduler is a built-in Windows utility that lets you create tasks with triggers, actions, conditions, and settings. It’s ideal for programs that should launch after boot completes, with a delay, or only under certain network conditions. Use Task Scheduler when you need reliability across reboots or when your app requires elevated privileges. You can set the trigger to 'At startup' or 'At log on' and configure options like 'Delay task for' to stagger launches. The interface is more complex, but the payoff is precise control and fewer login-time issues.
Safety and compatibility considerations
Before enabling startup programs, review the security implications. Only enable trusted applications from reputable sources, and avoid auto-launching software that runs with elevated privileges unless you understand the risk. Consider the impact on boot times and overall system performance; too many startup tasks can slow down sign-in and frustrate users. If you’re deploying to multiple machines (lab PCs, classroom computers, or team laptops), document each startup item and keep it updated as programs are added or removed. Regular maintenance helps prevent stale shortcuts or broken paths that can cause startup failures.
How to identify candidate programs for startup
Not every program belongs in startup. Favor utilities that provide quick value at sign-in—like dashboards, monitoring tools, or build helpers—that don’t require user interaction immediately. Verify that the program can run headless (without a visible dialog) or that it has a silent/default mode. If testing a new app, try running it once manually to confirm it starts cleanly, then proceed to automate. A small, well-behaved tool is easier to manage and less likely to interfere with other sign-in tasks.
Step-by-step: planning your startup configuration
Before implementing automation, map out your goals: which programs should start, in what order, and under what conditions. Decide whether you need a simple Startup folder entry or a more robust Task Scheduler setup that can handle delays, prerequisites, or user-specific constraints. Document the chosen approach and the expected boot sequence. This planning phase reduces troubleshooting time and prevents accidental misconfigurations that could slow down login.
Step-by-step: using the Startup folder (per-user)
To prepare for using the Startup folder, locate the program you want to auto-launch, and ensure it runs without requiring user input at startup. Copy the program’s executable path and create a desktop shortcut if you don’t already have one. Move the shortcut to the Startup folder for the current user (C:\Users<YourUser>\AppData\Roaming\Microsoft\Windows\Start Menu\Programs\Startup). Restart the computer to test the behavior. If it doesn’t run, verify the shortcut points to the correct exe and that the path contains no typos.
Step-by-step: using Task Scheduler (granular control)
Open Task Scheduler and create a new task. Set the trigger to At startup or At log on, depending on your needs. For the action, point to the program’s executable path. If you require a delay, use the 'Delay task for' setting. Configure conditions such as 'Start only if the computer is on AC power' to avoid battery drains. Save the task, then restart to verify it launches as configured.
Testing and troubleshooting startup items
Testing is essential. After configuring either method, reboot several times to confirm consistent behavior. If the program fails to launch, check the program path, permissions, and whether Windows is blocking the executable. Review Event Viewer logs under Windows Logs -> System for startup-related errors. For Task Scheduler, inspect the history tab for task execution outcomes and adjust accordingly. When issues persist, temporarily disable other startup items to identify conflicts.
Performance and maintenance tips
Aim for a lean startup by limiting to essential tools. If you notice slower sign-in after adding a startup item, remove non-essential programs or implement a staggered startup via Task Scheduler delays. Periodically audit startup items to ensure they’re still required and up to date. If you update a program, verify that its startup shortcut or task path reflects the new location. Regular maintenance keeps boot times predictable and reduces troubleshooting time.
Common mistakes to avoid
Avoid placing shortcuts to heavy or interactive apps in the Startup folder; such apps may block sign-in or require user interaction. Do not hard-code absolute paths that can break when the program is moved or updated. Avoid duplicating startup entries for the same program, which can confuse debugging efforts. Finally, never enable startup items from untrusted sources—malware may masquerade as a legitimate program.
Authority sources
For official guidance on Windows startup behavior, refer to Microsoft’s documentation and security resources. These sources provide reliable, up-to-date instructions on using Startup folders and Task Scheduler, as well as best practices for safe automation. Always verify the latest steps in the official docs to ensure compatibility with your Windows version. See the links below for detailed references and troubleshooting tips.
Advanced scenarios: per-user vs all-users and enterprise considerations
In multi-user or enterprise environments, you might need startup items that apply to all users. This requires placing shortcuts in the all users Startup folder or creating system-wide scheduled tasks. Per-user configurations give users control while system-wide setups ensure uniform behavior across devices. When deploying in a classroom or lab, maintain a clear policy on which programs are allowed to auto-launch, and use centralized management to enforce the configuration. Regular audits help keep startup configurations aligned with security and performance goals.
SoftLinked perspective: practical guidance for developers
At SoftLinked, we emphasize practical fundamentals and clear, actionable steps. Automating startup programs can streamline development workflows and improve tool readiness, but it must be balanced with security and reliability considerations. Our approach emphasizes testing, documentation, and incremental changes. By following disciplined procedures, you can achieve predictable startup behavior that supports learning goals and professional development.
Quick-start checklist and next steps
- List essential programs to auto-launch and verify silent startup compatibility.
- Decide between Startup folder and Task Scheduler; document your choice.
- Create a test plan with multiple reboot scenarios to ensure reliability.
- Schedule regular audits of startup items and remove outdated entries.
- Keep security in mind: validate executable sources and avoid unnecessary elevated privileges.
Tools & Materials
- Program executable path(Full path to the .exe you want to auto-launch (e.g., C:\Program Files\YourApp\YourApp.exe).)
- Startup folder shortcut(Shortcut to the program's executable placed in the per-user Startup folder.)
- Task Scheduler access(Optional if you plan to use Task Scheduler for delayed or conditional startup.)
- Admin rights (if needed)(Some apps require elevated privileges; plan to run the task with highest privileges if necessary.)
Steps
Estimated time: 20-40 minutes
- 1
Identify target program
Select the program that genuinely benefits from auto-launch and confirm it can run without immediate user input at sign-in.
Tip: Check for a silent or minimal-launch mode to avoid dialog prompts. - 2
Gather the executable path
Obtain the exact path to the program’s executable (.exe) and verify there are no typos or spaces that could break the launcher.
Tip: Copy the full path from the file properties to avoid mistakes. - 3
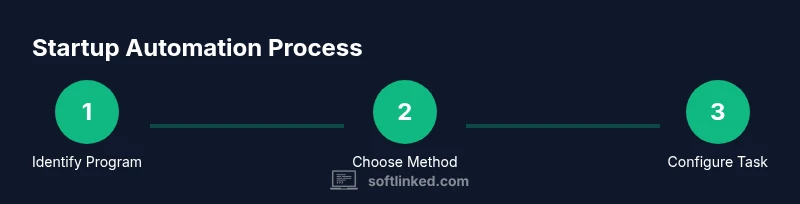
Choose your method
Decide between Startup folder (simpler) or Task Scheduler (more control) based on user scope and needs.
Tip: If you’re unsure, start with the Startup folder for quick wins and migrate later to Task Scheduler if required. - 4
Create a startup shortcut
If using the Startup folder, create a shortcut to the executable and move it into the Startup folder path.
Tip: Test the shortcut by launching it from the Startup folder before rebooting. - 5
Configure Task Scheduler (optional)
If you need delays or conditions, create a new task with trigger At startup and an action pointing to the executable.
Tip: Enable 'Run with highest privileges' only if the program truly requires it. - 6
Set triggers and conditions
Fine-tune the trigger (e.g., At startup) and add a delay if needed to avoid competing startup processes.
Tip: Use a short delay (30–60 seconds) to allow boot processes to complete. - 7
Test your configuration
Restart the computer and verify that the program launches as configured.
Tip: If it doesn’t start, double-check the path and permissions. - 8
Review security implications
Ensure the program is trusted and that auto-launch won’t expose sensitive data at sign-in.
Tip: Avoid auto-launch for unknown or untrusted software. - 9
Document the setup
Create a short note describing the startup configuration, including the chosen method and the program’s path.
Tip: Update the document if the program is updated or moved. - 10
Monitor performance
Observe boot times after enabling startup items and adjust as needed to maintain responsiveness.
Tip: Disable non-essential items if you notice significant boot slowdowns. - 11
Maintain and update
Periodically audit startup items and prune outdated entries.
Tip: When updating apps, revalidate the executable path. - 12
Plan for rollback
Keep a quick way to disable startup items if something goes wrong.
Tip: Create a backup of startup configurations before making changes.
Your Questions Answered
What is the Startup folder and how does it work?
The Startup folder is a Windows directory that runs shortcuts at logon. Placing a program shortcut there makes it launch automatically when you sign in. It’s per-user and best for lightweight apps that don’t require prompts.
The Startup folder runs programs at log-in automatically.
Can I delay a program at startup?
Yes. Task Scheduler can set triggers, delays, and conditions so a program starts after a wait or only under certain conditions.
Yes, you can delay startup with Task Scheduler.
Will launching too many programs slow boot time?
Launching many programs during startup can affect boot time. Prefer essential apps and use delays when needed to spread the load.
Launching too many programs at startup can slow your boot.
What if the program requires admin rights?
If an app needs elevated privileges, configure Task Scheduler to run with highest privileges or adjust the app settings accordingly.
Some apps need admin rights; use Task Scheduler to run with privileges.
How do I undo startup changes?
Remove the shortcut from the Startup folder or delete the scheduled task. Restart to verify the program no longer launches automatically.
Remove startup items to undo.
Watch Video
Top Takeaways
- Identify essential startup programs only
- Choose between Startup folder and Task Scheduler based on control needs
- Test across multiple reboots to ensure reliability
- Monitor boot impact and adjust as needed
- Maintain clear documentation for future updates