How to Check Software Publisher: A Practical Guide
A practical, step-by-step guide to verifying software publishers across Windows, macOS, and Linux, with code-signing basics and trusted-source validation.

Goal: You will verify who published a given software and confirm the trustworthiness of the source. By the end, you'll know where to find publisher data, how to interpret signatures, and which tools to use on Windows, macOS, and Linux. This quick check helps prevent malware and supply-chain risks by validating the publisher identity.
Why software publisher verification matters
According to SoftLinked, verifying the software publisher is a foundational security practice for developers and everyday users alike. When you know who published an application, you can assess trust, provenance, and integrity before you install or run code. The risk of tampering or malware grows when publisher data is missing or forged, and attackers frequently exploit unsigned or weakly signed installers to lure victims. Publisher verification provides an auditable trail for incident response and helps you decide whether to proceed, quarantine, or discard a file. For aspiring software engineers, mastering this skill early builds a habit of validating sources, which pays off in professional roles where security, reliability, and user trust matter. This section introduces the core ideas: where publisher information shows up on popular platforms, what a valid signature looks like, and how the landscape changes when you move from consumer downloads to enterprise software. By the end, you’ll have a practical mental model for evaluating publisher identity in real scenarios.
What data sources expose publisher information
Publisher data shows up in many places depending on the platform: installer properties, digital signatures, repository metadata, and certificate chains. On Windows, you’ll often see signer details in the file’s Digital Signatures tab; on macOS, the codesign output or Get Info panels reveal the Developer identity; and on Linux distributions, package managers expose signature and origin data. Understanding where to look is the first step in how to check software publisher. Beyond OS surfaces, you may also encounter advisories from vendors or security feeds that confirm a publisher’s reputation or flag recent compromises. The more sources you consult, the stronger your confidence in the publisher’s identity becomes. Incorporate cross-checks with official vendor statements to align the data you collect with public records and release notes.
How to verify publisher data on Windows
Windows provides several surfaces to view who signed an executable or installer. The simplest path is to view the file’s Properties > Digital Signatures tab, which lists the signer, the certificate issuer, and the status. If the tab is missing or the signature shows errors, treat the file with caution. For developers who need deeper checks, the signtool utility can enumerate signatures, verify certificate chains, and compare the signer against known trusted authorities. Always ensure the certificate is valid, not expired, and issued by a recognized certificate authority. When evaluating publisher data, cross-check the signer name with the vendor’s official site and compare the embedded metadata with the installer’s advertised version. If you can't validate these signals quickly, abort installation and seek a verified copy from a trusted source.
How to verify publisher data on macOS
macOS uses the codesign tool and Finder's Get Info panels to reveal who published an app. Right-click the app, choose Get Info, and look for the Developer or Team name, along with the certificate chain. On Gatekeeper-enabled systems, macOS will also display a warning if the app is not from an identified developer. Use the Terminal: codesign --verify --deep --strict /Path/To/App to confirm the signer and check that the certificate is trusted. You should see a valid result and the signer’s identity should match the vendor’s official branding. For installers outside the App Store, always inspect the embedded signature and compare the developer identity against the vendor’s published information. If anything looks inconsistent or the certificate cannot be validated, do not run the software.
How to verify publisher data on Linux
Linux ecosystems vary by distribution, but core checks remain similar. Package managers (rpm, dpkg, or pacman) expose signature and origin data in package metadata. Use commands like rpm -qi package or dpkg-sig to inspect the signature, and verify that the signing key belongs to the vendor’s public key. For source builds, verify PGP signatures using gpg --verify, ensuring the key is from the official repository and trusted by your keyring. If you download standalone binaries, check checksums (SHA256/SHA3) provided by the vendor and compare them to those published on the official site. In environments with automated deployment, maintain a trusted key store and implement automatic verification in your CI/CD pipeline. While Linux tools differ by distro, the principle is the same: confirm identity, trust chain, and integrity before installation.
Understanding code signing and certificates
Code signing attaches a digital signature to software, proving who published it and that the code has not been altered since signing. Certificates are issued by trusted Certificate Authorities, forming a chain from root to leaf certificates. Validating this chain requires checking the signature, the certificate’s validity period, revocation status, and the issuer’s trust store. In practice, you should see a green signal in your OS, a non-expired certificate, and a signer identity that matches the vendor’s official name. Developers can implement code signing as part of the build pipeline to ensure that every release carries a verifiable signature. For users, this means choosing installers that present a trusted signature and avoiding software whose certificate chain is broken or unknown. When in doubt, compare the signer’s identity with the vendor’s published identity and use multiple verification signals to confirm authenticity.
Practical checks you can perform before installation
Before you install any software, perform a small checklist of publisher-focused checks. First, verify the source: download only from the vendor’s official site or a trusted repository. Second, inspect the signature or certificate using OS tools, ensuring the signer’s name matches the vendor and the certificate is valid. Third, confirm the file hash or checksum if provided by the vendor. Fourth, look for recent advisories or security notices tied to the publisher. Fifth, keep your system's certificate store up to date so that trusted signers remain recognized. Finally, document your checks for audit trails and future reference. If you encounter any red flags—an unknown signer, a missing signature, or a certificate that cannot be validated—abort the installation and obtain a verified copy. These steps help you avoid common phishing attempts and counterfeit software.
Common mistakes to avoid
A few frequent errors undermine publisher checks. Relying solely on the presence of a signature without validating the signer’s identity is risky. Treating warnings from antivirus software as conclusive instead of investigating the publisher can mislead you. Using outdated certificate stores is another pitfall, as trusted roots evolve and revocations become more common. Another trap is assuming that a reputable vendor cannot be compromised; even established publishers can be affected by supply-chain issues. Finally, ignoring platform-specific nuances—what is valid on Windows may look different on macOS or Linux—can lead to false confidence. To improve accuracy, cross-check across multiple signals: signature, certificate, hash, vendor advisories, and official release notes. Remember also to test in a controlled environment before rolling out software to production systems.
Integrating publisher checks into your development workflow
For developers, make publisher verification a built-in habit rather than a afterthought. Start by adding a pre-release step in your CI/CD pipeline to verify the signatures of all binaries and installers, and to compare signer identities against a allowlist of trusted vendors. Include unit tests that parse metadata from installation packages and report any mismatch. In production, instrument your deployment tooling to fail fast when a publisher cannot be verified. Document the expected publisher identities in policy documents accessible to the team. Finally, train team members on recognizing common red flags and provide quick-reference checklists. By integrating these checks into the development lifecycle, you protect users, simplify incident response, and reduce risk during distribution. If you maintain open-source components, consider signing dependencies and verifying their sources identically.
Keeping publisher data up to date and audited
Publisher data is not static; vendors rotate certificates, switch signing keys, and publish new versions. Establish a routine to refresh trusted roots in your OS store, review signature patterns after major updates, and re-verify installers when updates are released. Maintain a risk register that tracks which publishers are in your allowed list, along with evidence from verification steps. Automate periodic checks where possible, such as revalidating signatures for critical software packages in your environment. Conduct occasional audits that compare installed software against a known-good baseline, noting any deviations. Finally, share learnings with your team and update internal guidelines to reflect evolving threats and signing practices. The habit of ongoing publisher validation strengthens software trust and reduces exposure to supply-chain compromises.
Tools & Materials
- A computer with internet access(Windows, macOS, or Linux)
- Official download sources or vendor installers(Always fetch from the vendor or trusted repositories)
- Built-in verification tools (OS-specific)(e.g., Windows signtool, macOS codesign, dpkg/rpm verifiers)
- Certificate store access and up-to-date root certificates(Keep roots updated to validate signers)
- Optional: third-party verification tools or cryptographic utilities(For deeper checks (e.g., sigcheck, GPG))
- A browser or terminal for documentation and advisories(To cross-check vendor notices)
Steps
Estimated time: 30-60 minutes
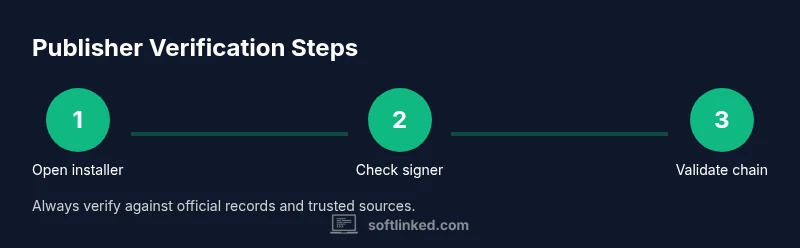
- 1
Open the installer or package to inspect metadata
Begin by locating the downloaded file and assessing its basic properties. Check file type, size consistency with the vendor’s notes, and presence of any accompanying metadata. This initial scan helps you decide if further checks are warranted.
Tip: If the file appears suspicious (unexpected extension, unusually large hash mismatch), pause and source from official channels. - 2
Check the signer name in the signature
View the signature block to identify the signer’s name. Compare it against the vendor’s official branding and domain. A mismatch is a red flag and warrants deeper verification or rejection.
Tip: Enforce a strict allowlist of known reputable publishers for critical software. - 3
Validate certificate chain against trusted roots
Verify that the certificate chain ends at a trusted root authority. Look for valid dates and absence of revocation signals. An invalid chain means the signature cannot be trusted.
Tip: Ensure your system’s trust store is current to avoid false negatives. - 4
Verify the signature hash against official records
If the publisher provides a hash (SHA-256, SHA-3), compute the file’s hash and compare. A mismatch indicates tampering or corruption.
Tip: Use multiple hash types when available for redundancy. - 5
Cross-check publisher identity with official vendor
Visit the vendor’s official site or repository and confirm the signer’s identity, certificate details, and version metadata align with the release notes.
Tip: Document any deviations for audit purposes. - 6
Use OS-specific verification tools
Leverage built-in verifiers (Windows Signtool, macOS codesign, Linux package verifiers) to automate checks. They provide structured outputs suitable for scripting.
Tip: Automate these checks in scripts to reduce manual errors. - 7
Check for revocation status
Look up Certificate Revocation Lists or OCSP responses. Revoked certificates should block installation and trigger vendor advisories.
Tip: Revocation checks may affect performance; balance security with practicality. - 8
Consider platform-specific nuances
Regard Windows, macOS, and Linux as distinct ecosystems. A signal valid on one platform may not apply identically on another.
Tip: Always tailor checks to the target platform before deployment. - 9
Document results and decide to install or abort
Record the verification outcomes, sign-off status, and any risk notes. Use this record to decide whether to install or escalate.
Tip: If in doubt, err on the side of caution and seek a verified copy. - 10
Automate publisher checks in build and deployment
Embed publisher verification into CI/CD or deployment pipelines. Automated checks reduce human error and speed up secure distribution.
Tip: Version-control your verification scripts and maintain an approved publishers list.
Your Questions Answered
What does checking the software publisher actually protect you from?
It helps prevent malware or tampered installers by confirming the signer identity and the integrity of the software.
Verifying the publisher helps you avoid malware by confirming who signed the software and that the file hasn't been altered.
Which OS tools can I use to check the publisher?
Windows, macOS, and Linux all provide built-in methods to view publisher data and signatures in installers or apps.
All major operating systems have built-in signal checks you can use.
Is it safe to trust a publisher from a download site?
Downloading from official sources reduces risk; always verify signatures and certificates regardless of source.
Only trust signed software from official sources, and verify the signature.
What is code signing and why does it matter?
Code signing confirms the publisher and file integrity through a digital signature; it helps establish trust.
Code signing signs the software to prove who published it and that it hasn't changed.
Can these checks be bypassed by attackers?
Yes, attackers may attempt to forge signatures or present invalid certificates; always verify via multiple indicators.
Yes, forging signatures is possible; use multiple checks to guard against it.
How often should I re-check a publisher?
Re-check whenever you install updates or new software, and routinely audit trusted vendors.
Check again when updating or installing new software from vendors you trust.
Watch Video
Top Takeaways
- Verify publisher identity before installation.
- Cross-check signatures, certificates, and hashes.
- Use OS-native tools to streamline checks.
- Document verification outcomes for audits.
- Automate checks within CI/CD for consistency.