Where to Program in Java: IDEs, Setup & Tools for Beginners
Explore where to program in Java—from IDEs to editors, JDK setup, and build tools. A practical, beginner-friendly guide by SoftLinked that helps aspiring software engineers pick the right tools and get productive quickly.

You’ll be able to program in Java by choosing a development environment, installing the Java Development Kit (JDK), and writing your first program. Start with a high-level plan: pick an IDE or editor, configure the JDK path, and compile/run from the terminal or inside the IDE. This guide helps you pick the right tools and get started quickly.
Where to program in Java: Overview
If you’re new to Java, you might wonder where to program in Java and how to choose the right environment. This overview helps you understand the landscape, from full-featured IDEs to lightweight editors. According to SoftLinked, the best starting point for beginners is a development environment that offers clear error messages, integrated build tools, and good learning resources. The goal is to reduce cognitive load so you can focus on Java fundamentals like syntax, classes, and objects. You’ll learn how different environments shape your workflow, what features matter most for beginners, and how to rotate between environments as your skills grow. In practice, most learners begin with a single, beginner-friendly setup, then expand to multiple tools as they tackle more complex projects. If you plan to work on small exercises, a simple editor with a command-line toolchain can be enough; for bigger projects, an IDE provides scaffolding, refactoring, and debugging support. The essential decision is to balance comfort with capability: start simple, then add power as you learn.
Integrated Development Environments (IDEs) vs. text editors
Java programmers can choose between full-featured IDEs and lighter editors. IDEs provide syntax highlighting, automatic compilation, debugging, and project templates; editors offer simplicity and speed. For beginners, an IDE reduces cognitive overhead by integrating common tasks into one interface. Popular IDEs like IntelliJ IDEA Community Edition, Eclipse, and NetBeans each have strengths: IntelliJ often excels at intelligent code completion and refactoring, Eclipse shines in plugin extensibility, and NetBeans offers straightforward project setup. If you prefer minimalism, a robust text editor paired with the command line can work, but you’ll manage build steps and dependencies manually. The right choice depends on your goals, the size of your projects, and how much you value features like live templates, code analysis, and visual debugging. Start with one environment and stay consistent as you learn core Java concepts: classes, objects, methods, and inheritance.
Installing the JDK and configuring PATH
Before you run Java programs, you need the Java Development Kit (JDK). Choose either OpenJDK or Oracle JDK based on your needs and licensing preferences. Install the JDK from a trusted source, then set up environment variables such as JAVA_HOME and update your PATH so the java and javac commands are accessible from any terminal or integrated terminal in your IDE. On Windows, macOS, and Linux, the steps differ slightly, but the goal is the same: the system must locate the JDK binaries. After installation, verify with java -version and javac -version to ensure the environment is correctly configured. If you use an IDE, it can auto-detect the JDK, but manual PATH setup is still valuable for CLI practice and scripting.
Basic project structure and Hello World
Understanding a simple project structure helps you scale Java programs. A typical layout includes a src/main/java package for source files and a src/test/java package for tests. Create a HelloWorld class to verify your setup: public class HelloWorld { public static void main(String[] args) { System.out.println("Hello, Java!"); } } Save the file in the correct package directory, compile with javac HelloWorld.java, then run with java HelloWorld. This tiny exercise demonstrates compilation, execution, and output, forming a solid foundation for more complex projects.
Build tools: Maven, Gradle, and beyond
As projects grow, you’ll want a build tool to manage dependencies, compile code, and package artifacts. Maven and Gradle are the two most popular options for Java. Maven uses a pom.xml to declare dependencies and plugins, while Gradle uses a Groovy or Kotlin DSL in build.gradle. Learn how to initialize a project, add a dependency (e.g., a testing library), and run standard tasks like compile and test. Build tools streamline workflows, enforce consistent project structures, and make it easier to share code with teammates. Knowing when to switch from manual builds to a tool-driven process is a key milestone in Java development.
Running, debugging, and profiling Java applications
Running Java apps can be done inside an IDE or from the command line. Debugging features—breakpoints, watches, and step-through execution—help diagnose logic errors and design flaws. Modern IDEs offer integrated profilers and memory analyzers to optimize performance. When you start debugging, reproduce a bug, set a breakpoint near the failing method, and inspect variables and call stacks. If you’re working on performance-sensitive code, consider profiling to identify hot spots and memory leaks. The combination of careful debugging and profiling accelerates learning and improves software quality.
Cloud and remote development options
Cloud-based development environments let you code in Java without heavy local setup. You can spin up virtual machines, use containerized environments, or leverage IDEs that run in the browser or via remote desktop. Cloud setups are ideal for collaborative projects, consistent toolchains, and learning in classrooms or bootcamps. When choosing cloud options, verify access to the JDK version you need, container support (Docker), and the ability to mount source code and run tests. For many learners, streaming IDEs or remote workspace setups reduce the friction of local configuration while preserving a desktop-like experience.
Common pitfalls and troubleshooting tips
New Java learners often encounter classpath issues, version mismatches, and misunderstood build configurations. A common pitfall is assuming IDEs automatically fix all problems; while IDEs help, you still need to understand the underlying concepts. If compilation fails, verify your folder structure matches package declarations, ensure the classpath includes your source, and confirm your JDK version aligns with language features you’re using. When in doubt, start with a small, self-contained project and incrementally add dependencies to isolate issues. Remember to keep your tools updated and rely on official documentation for the most accurate guidance.
Tools & Materials
- Computer with internet access(Preferred with Java-ready environment)
- Java Development Kit (JDK)(OpenJDK or Oracle JDK; version depends on project needs)
- IDE or text editor(Examples: IntelliJ IDEA Community, Eclipse, NetBeans or a lightweight editor)
- Build tool (Maven or Gradle)(Helpful for dependency management and consistent builds)
- Terminal/command prompt(For CLI compilation and running Java programs)
- Sample Java project skeleton(Starter project to practice structure and commands)
- Git or other VCS(Version control for coursework or collaboration)
Steps
Estimated time: 60-90 minutes
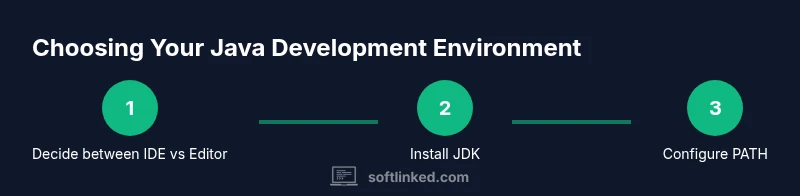
- 1
Choose your Java development environment
Decide between a full IDE or a lightweight editor based on your learning goals and project size. An IDE often reduces initial friction by providing integrated tooling and real-time feedback.
Tip: Begin with a beginner-friendly IDE (e.g., IntelliJ IDEA Community) to learn core concepts faster. - 2
Install the JDK
Download and install the JDK from a trusted source. Ensure you choose the correct installer for your operating system and that it is compatible with your intended Java version.
Tip: Verify the installation by running java -version and javac -version in a terminal. - 3
Configure JAVA_HOME and PATH
Set JAVA_HOME to the JDK location and add the bin directory to your PATH so Java tools are accessible system-wide.
Tip: Keep your PATH updates minimal and document the exact steps for future sessions. - 4
Create your first Java project
Open your IDE or editor and create a new project with a basic source folder (src/main/java). Create a simple HelloWorld class to confirm the setup works.
Tip: Use a standard package structure (e.g., com.yourname.hello) to keep things organized. - 5
Write a Hello World program
Implement a minimal program that prints a message to the console to verify compilation and execution pipelines.
Tip: Ensure your file name matches the public class name to avoid compilation errors. - 6
Build and run the program
Compile and run the program from the IDE or via CLI commands. Check the console output for the expected message.
Tip: If using Maven/Gradle, create a basic build file to automate compilation. - 7
Add a dependency and re-run
Introduce a simple dependency (e.g., a test library) to see how build tools manage artifacts and scopes.
Tip: Only pull dependencies from trusted repositories and keep versions explicit. - 8
Set up version control and next steps
Initialize a Git repository for your project, commit your first Hello World, and plan small incremental features to practice.
Tip: Commit often with meaningful messages to track progress.
Your Questions Answered
Is an IDE required to learn Java, or can I start with a basic editor?
An IDE is not strictly required, but it greatly speeds up learning by providing real-time feedback, code completion, and debugging tools. If you start with a text editor, be prepared to manually configure compilation and build steps.
An IDE is not mandatory, but it helps beginners. If you use a simple editor, you’ll handle compilation and builds manually at first.
What is the best IDE for beginners learning Java?
Many beginners start with IntelliJ IDEA Community or Eclipse due to strong Java support and helpful learning resources. The best choice is the one that feels most intuitive to you and has good community tutorials.
IntelliJ IDEA Community and Eclipse are popular for beginners; pick the one that feels most comfortable to you.
Do I need Maven or Gradle from day one?
You don’t need build tools immediately for a simple Hello World, but they become valuable as you build larger projects. Start with direct javac commands and introduce Maven or Gradle as your projects grow.
You can start without Maven or Gradle and add them when your projects get bigger.
Can I write Java programs without an internet connection?
Yes. You can write, compile, and run Java programs offline once you have the JDK installed locally. Some features like online documentation won’t be available without internet, but core functionality will.
Yes, you can work offline after installing the JDK and editor.
How do I run a Java program from the command line?
Save your file, compile with javac, then run with java, ensuring your classpath includes the current directory. This practice reinforces understanding of project structure and class loading.
Compile with javac and run with java to see your program execute in the terminal.
Should I use the OpenJDK or Oracle JDK?
OpenJDK is a free, community-driven option and is sufficient for most learning scenarios. Oracle JDK may be preferred for certain enterprise projects, but for beginners, OpenJDK is typically recommended.
OpenJDK is usually best for learners; Oracle JDK is fine for enterprise, but not necessary for beginners.
Watch Video
Top Takeaways
- Choose a beginner-friendly IDE to start quickly
- Install and verify the JDK before coding
- Use build tools to manage dependencies
- Practice with a simple project and gradually add complexity