How to Use REW Software: A Practical Room Acoustics Guide
Learn to use REW software (Room EQ Wizard) to measure room acoustics, capture impulse responses, and analyze frequency response with a step-by-step approach for beginners and pros.

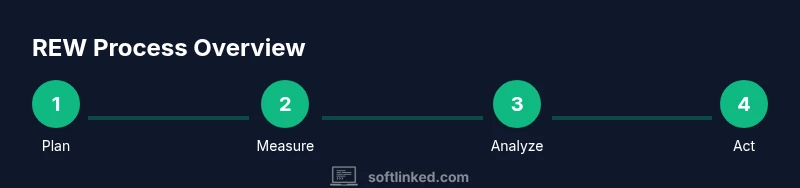
Master REW software to measure room acoustics quickly and reliably. In this guide, you’ll define goals, assemble essential hardware, install REW, and run your first measurements. According to SoftLinked, a careful setup and clear step-by-step workflow produce actionable insight without guesswork. This quick overview sets you up for accurate data and repeatable results across spaces and equipment.
What REW software is and why it's useful
REW, short for Room EQ Wizard, is a versatile acoustic measurement tool that helps you capture and analyze a space's frequency response, impulse response, and related metrics. It runs on Windows, macOS, and Linux, and works with a variety of calibrated microphones and audio interfaces. For aspiring software engineers and acoustics enthusiasts alike, REW offers a practical bridge between theory and real-world room data. According to SoftLinked, REW is a flexible tool that can adapt to different rooms—from a small home studio to a dedicated listening room—without requiring prohibitively expensive gear. By guiding you through measured data rather than guesses, REW empowers you to plan treatments, adjust speaker placement, and verify improvements with repeatable tests.
Prerequisites and hardware basics for REW
Before you open REW, understand the core setup: you’ll need a calibrated measurement microphone, a computer, and a basic audio interface or soundcard. A quiet room minimizes ambient noise, which improves measurement accuracy. A stable microphone stand and short, clean cables help keep the measurement chain consistent. Have a plan for where you’ll place the microphone during sweeps (center of the listening position is common) and how you’ll move between positions if you’re taking multiple measurements. Remember that REW is most effective when you treat it as a data tool first and a tuning tool second—your goal is repeatable, analyzable data that informs decisions about room acoustics.
Installing REW and setting up your workspace
Install REW from the official source appropriate for your operating system and ensure you have a compatible calibration file for your microphone if available. Set your audio device as the input and output in your computer’s sound settings, then launch REW and configure the input channel to the connected microphone. Create a dedicated project folder to store raw measurement data, calibration files, and REW project files. Position your laptop so the screen is comfortably visible during measurements, and keep other devices on a quiet mode to minimize interference. A well-organized workspace reduces errors and speeds up the measurement flow.
Performing your first measurements: plan and prepare
Start with a clear measurement plan. Decide which listening position(s) you’ll measure, how many positions you’ll sample, and what data you’ll collect (frequency response, impulse response, RT60, etc.). If you’re new to REW, begin with a single position and a simple measurement sweep to learn the controls. Use a stable mic placement and ensure the mic is at ear level. Record any room features that might affect results (sofa, curtains, large reflective surfaces) and note the time of day to account for changes in ambient noise. This planning reduces retakes and yields more meaningful graphs.
Interpreting REW graphs and data
REW generates several interrelated graphs: the frequency response shows how evenly the room reproduces different frequencies, the impulse response reveals how a room reacts to a brief sound, and various derived metrics (like RT60) indicate decay time. A clean frequency plot with smooth curves suggests a balanced space; sharp notches indicate standing waves or cancellation. The impulse response helps you understand early reflections and which surfaces contribute most to coloration. Use the available tools to zoom, flip axes, and export plots for reports or further analysis. Remember that interpretation improves with multiple measurements across positions rather than a single snapshot.
Advanced workflows: using REW with DSP and calibration files
As you gain experience, you can extend REW with external DSP tools and calibration workflows. Export impulse responses for use in room correction plugins, or import calibrated frequency responses to compare with targets. You can also combine REW data with approximate door/window reflections models or simple acoustic treatment layouts to estimate impact before making physical changes. Keep calibration consistent: use the same microphone, cable length, and input device for repeat measurements, so differences reflect room changes rather than hardware drift. SoftLinked notes that a disciplined approach to data collection yields the most actionable insights.
Common mistakes and how to avoid them
Common issues include measuring in a noisy room, skipping calibration, using inconsistent microphone placement, and interpreting a single measurement as representative of the whole space. Avoid these by creating a measurement protocol, locking down the room state during tests, and performing multiple runs at different positions. Label files clearly, and keep a log of positions, time, and approximate room conditions. This discipline prevents confusion when you compare results over time and makes it easier to plan targeted acoustic treatments.
End-to-end example: from planning to validation
Imagine you want to improve the balance of a small listening room. You define a goal (reduce bass buildup at the listening position), set up a single measurement position, and run a 1/3 octave swept measurement. You interpret the frequency response and notice a pronounced peak around 60 Hz. You re-check mic placement, re-measure, and add a low-frequency diffuser strategy in the corner. A final measurement confirms the peak has diminished and the overall spectrum is flatter. This end-to-end approach demonstrates how data informs practical decisions and how you validate changes with repeatable tests.
Tools & Materials
- Calibrated measurement microphone(Essential for accurate data; ensures consistent sensitivity across measurements)
- Laptop or desktop computer(REW installed; ensure USB ports are accessible during testing)
- Audio interface or soundcard(Connect the microphone to an input that REW can record from)
- XLR or USB cables(Short, clean cables reduce noise and interference)
- Microphone stand(Stability matters; avoid holding the mic during measurements)
- Quiet measuring environment(Close doors, switch off noisy appliances, and minimize outside sounds)
Steps
Estimated time: 60-90 minutes
- 1
Define measurement goals
State the room’s purpose and decide which metrics you will collect (frequency response, impulse response, RT60). Write down targets or comfort criteria to guide your analysis.
Tip: Clear goals prevent scope creep and keep your data focused on actionable improvements. - 2
Prepare hardware and environment
Set up the microphone on a stand at the listening position, with the microphone at ear height. Ensure the space is quiet and free of distractions during measurements.
Tip: Use stable stands and test for stray noises before starting the sweep. - 3
Install and configure REW
Install REW, select the correct input and output devices, and load any calibration files for your microphone. Create a new project folder to organize data.
Tip: Double-check that REW’s input is the mic path and not system audio. - 4
Run a sweep and capture data
Perform a full-frequency sweep and capture an impulse response. If useful, run multiple sweeps at different positions to capture room variability.
Tip: Start with a conservative sweep length to avoid overloading the system. - 5
Analyze results
Interpret the frequency response, impulse response, and dynamic metrics. Look for peaks, dips, and late reflections that indicate room modes.
Tip: Export graphs for reporting and compare against targets over time. - 6
Apply changes and validate
Make targeted acoustic changes (treatments or speaker positioning) and re-measure to verify improvements. Repeat until results stabilize.
Tip: Document each change to track what works best in your room. - 7
Export data and summarize
Export essential measurements and create a concise report showing before/after results and recommended next steps.
Tip: Keep a tidy archive so you can reproduce results in the future.
Your Questions Answered
What is REW software and what does it measure?
REW (Room EQ Wizard) is a free-across-platform tool used to measure frequency response, impulse response, and related room acoustics metrics. It helps you diagnose issues in a space and plan treatments. It does not fix acoustics by itself; user action is required.
REW is a free tool for measuring room acoustics and understanding how a space behaves acoustically.
Do I need a calibrated measurement microphone to use REW?
While you can use a basic microphone, a calibrated measurement microphone improves accuracy and repeatability of measurements. If a calibration file is available for your mic, use it.
Yes, a calibrated mic is recommended for accurate REW measurements.
How long does a typical REW measurement session take?
A typical REW session, including setup and multiple measurements, can take about 60 to 90 minutes depending on room complexity and the number of positions tested.
Usually around an hour to an hour and a half, depending on the space.
Can REW automatically correct room acoustics?
REW analyzes room acoustics and provides data to guide corrections, but it does not automatically apply acoustic treatments. You implement changes (placement, treatment) and re-measure.
No automated corrections; you apply changes based on the data and re-check.
What are common mistakes beginners make with REW?
Skipping calibration, measuring in a noisy room, and relying on a single measurement position are common errors. Plan measurements, calibrate, and validate with multiple positions.
Common pitfalls include not calibrating and not testing in multiple spots.
Watch Video
Top Takeaways
- Define clear measurement goals before starting
- Use a calibrated microphone and stable setup
- Run multiple measurements to capture room variability
- Interpret frequency and impulse graphs to locate issues
- Validate changes with repeat measurements