Is It OK to Delete Software Distribution Files? A Practical Guide
Learn when and how to safely delete Windows SoftwareDistribution cache files to reclaim disk space, fix update issues, and keep your system healthy. This guide covers safe steps, risks, and best practices.

Deleting software distribution files is generally safe after you stop Windows Update services and back up your data. The cleanup frees disk space and can fix update problems, but Windows will re-download any required files. Avoid deleting while updates are actively installing, and prefer renaming the folder as a rollback precaution.
What are software distribution files and why they exist
Software distribution files refer to the cache Windows uses to store update data before installation. In Windows, the folder often named SoftwareDistribution acts as a staging area for downloaded updates, bits of metadata, and related components. Over time, this cache can grow large, consuming disk space and potentially becoming corrupted. The presence of these files is ordinary and intended to speed up future updates, but they are not essential for your day-to-day operation once updates have installed. Understanding this helps address questions like is it OK to delete software distribution files when you need to reclaim space or troubleshoot update issues. According to SoftLinked, knowing what sits in this cache helps you apply targeted cleanup without affecting your system stability.
Is it OK to delete software distribution files? and why it helps
Deleting the SoftwareDistribution cache can resolve corrupted update data and reclaim significant disk space on machines with long update histories. However, the action should be deliberate: you should not delete while Windows Update is actively running or when updates are pending installation. The cache will be rebuilt as Windows checks for and downloads updates again. SoftLinked emphasizes that this is a troubleshooting and maintenance technique, not a routine daily cleanup. When performed correctly, it reduces wasted bandwidth, minimizes failed updates, and helps Windows Update service recover more quickly from transient errors.
When not to delete and how to avoid risks
If Windows Update is in the middle of an installation, deleting the cache can interrupt updates and potentially leave the system in an unstable state. In such cases, wait for updates to finish, reboot if prompted, and then consider cleanup. If you rely on ongoing updates for security, you should plan cleanup during a maintenance window. In addition, always ensure you have a backup of important files before modifying system caches. SoftLinked notes that risk minimization comes from proper sequencing and validation after cleanup.
Prerequisites for a safe cleanup
Before you touch any system folders, prepare a backup strategy. Create a restore point if your OS supports it, and ensure you have a backup of critical data. Have your administrator credentials handy, and consider performing the operation during a time when you can monitor the outcome. A clean slate also means you should be ready to re-check for updates immediately after the cleanup to ensure that Windows Update can fetch fresh files without issues. SoftLinked highlights that preparation reduces the chance of accidental data loss or prolonged downtime.
The step-by-step plan at a glance
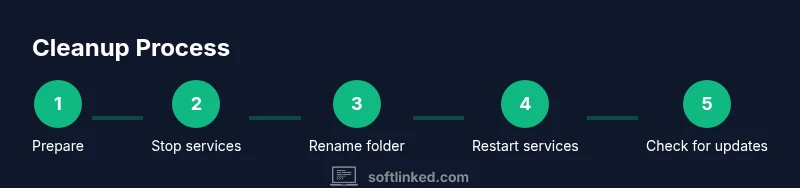
A safe cleanup involves stopping update services, renaming or deleting the SoftwareDistribution folder, restarting services, and then checking for updates. This approach minimizes the risk of corruption spreading to other components while keeping the system functional during the process. We’ll walk through the exact steps in the next sections and provide practical commands you can use in an elevated command prompt or PowerShell session. SoftLinked’s guidance emphasizes controlled sequencing to minimize downtime and ensure a clean rebuild of the cache.
Step 1 — Prepare and back up
Begin with preparation: close unnecessary applications, save work, and create a restore point if your system supports it. Then back up the SoftwareDistribution folder if you have a safe, external location available. This backup gives you a rollback option if anything goes wrong during the cleanup. SoftLinked recommends documenting your plan and keeping a log of commands you run, which makes troubleshooting easier if the cleanup doesn’t go as expected.
Step 2 — Stop Windows Update services
Open an elevated command prompt or PowerShell and run the typical sequence: net stop wuauserv, net stop cryptsvc, net stop bits, and net stop msiserver. Stopping these services is crucial to prevent files from being in use and to ensure that Windows Update doesn’t lock files during cleanup. If you’re on a managed device, you may need administrator approval or use the Services app to stop related services. SoftLinked notes that stopping services is the most important prerequisite for a safe cleanup.
Step 3 — Rename or delete the SoftwareDistribution folder
Navigate to C:\Windows and rename the SoftwareDistribution folder to SoftwareDistribution.old (or similar). Renaming preserves the original data as a rollback option if needed. If you’d rather delete, ensure you’re certain updates aren’t in progress and you’ve backed up important content. After renaming, Windows will recreate the folder automatically when you check for updates. This step is the core of the cleanup, and careful handling reduces risks while freeing space.
Step 4 — Restart services and reboot
Start the Windows Update services again in the reverse order: net start wuauserv, net start cryptsvc, net start bits, and net start msiserver. After restarting, reboot your computer to ensure all services initialize cleanly and the cache rebuilds properly. A fresh boot helps verify that Windows Update can resume normal operation and that no lingering processes are holding onto files.
Step 5 — Check for updates and verify system health
After reboot, run Windows Update to fetch fresh copies of the updates you need. Check for any errors and review the update history to confirm that new files are downloading and installing correctly. If issues persist, a deeper diagnostic approach may be required, including checking network settings, disk integrity, and Windows Update components. SoftLinked’s framework encourages verification steps to ensure the cleanup achieved its intended effect.
Alternatives and additional cleanup methods
If you prefer not to manipulate system folders directly, you can use built-in tools like Disk Cleanup or Storage Settings to remove Windows Update files and other cache data. Disk Cleanup can be configured to delete previous Windows updates, temporary files, and system caches. While these tools are convenient, they may not clear all problematic data that a targeted SoftwareDistribution cleanup would address. SoftLinked acknowledges that multiple methods exist; choose the approach that best fits your technical comfort and the issue you’re solving.
Cross-platform notes: Windows vs macOS vs Linux cache management
The concept of a software distribution cache exists across operating systems but differs in location and behavior. Windows uses SoftwareDistribution as the update cache; macOS and Linux use different caches for system updates or package managers (such as apt or Homebrew). The exact steps to clean those caches vary, so this guide focuses on Windows. Knowing the general approach—stop, rename/delete, restart, verify—helps you adapt to other ecosystems if needed.
Best practices and ongoing maintenance
Establish a routine maintenance window to review disk usage and update health. Keep a current backup, enable system restore or snapshots where possible, and monitor update behavior after each cleanup. Document lessons learned so future maintenance is faster and safer. SoftLinked recommends aligning these practices with your organization’s policies and using automation where appropriate to reduce manual steps.
Tools & Materials
- Administrative access (administrator rights)(Open an elevated Command Prompt or PowerShell.)
- Backup storage(External drive or cloud storage for backups.)
- Backup of important data(Optional but strongly advised.)
- Command line utilities(PowerShell or Command Prompt with admin rights.)
- Stable internet connection(Needed for re-downloading updates after cleanup.)
- System restart(A reboot helps ensure services initialize cleanly.)
Steps
Estimated time: 15-45 minutes
- 1
Prepare and back up
Close nonessential apps, back up important data, and create a restore point if available. This minimizes risk if something goes wrong during cleanup.
Tip: Keeping a quick log of what you do helps with troubleshooting later. - 2
Stop Windows Update services
Open an elevated terminal and run the sequence to stop services: net stop wuauserv, net stop cryptsvc, net stop bits, net stop msiserver.
Tip: If a service refuses to stop, gently reboot to release locks before retrying. - 3
Rename the SoftwareDistribution folder
Navigate to C:\Windows and rename SoftwareDistribution to SoftwareDistribution.old. This preserves a rollback option if needed.
Tip: Renaming is safer than permanent deletion; you can revert by restoring the original name. - 4
Restart update-related services
Start the services again in reverse order: net start wuauserv, net start cryptsvc, net start bits, net start msiserver.
Tip: Double-check that each service reports as running in the Services app. - 5
Reboot the machine
Restart your computer to ensure a clean environment for Windows Update to rebuild the cache.
Tip: A fresh boot helps reduce post-cleanup errors. - 6
Check for updates
Run Windows Update to download fresh copies of needed updates and verify that the system re-acquires cache content correctly.
Tip: If updates fail, note error codes for targeted troubleshooting. - 7
Verify disk space and health
Review free space and run basic disk checks to ensure there are no underlying storage issues that could cause update failures.
Tip: Low disk space can cause update failures even after cleanup. - 8
Consider Disk Cleanup for additional cleanup
Run Disk Cleanup or Storage settings to remove older update files and cache data beyond the SoftwareDistribution cache.
Tip: Disk Cleanup is safer for casual cleanup but may not clear all problematic caches. - 9
Document the process
Record the steps you took and any errors encountered for future maintenance.
Tip: Documentation speeds up future triage and helps teammates reproduce fixes.
Your Questions Answered
What is the SoftwareDistribution folder?
It is Windows Update's cache that stores downloaded updates and metadata. Deleting its contents can fix corruption and recover disk space, but Windows will recreate it as updates are downloaded again.
The SoftwareDistribution folder is Windows Update's cache. Deleting its contents can fix problems and reclaim space, but Windows will re-create it when needed.
Is it safe to delete SoftwareDistribution files?
Yes, but only after stopping update services and making sure updates are not currently installing. It will cause Windows to re-download updates as needed.
Yes, after stopping services and ensuring updates aren’t installing, you can safely delete to reclaim space.
Will deleting affect already installed updates?
No. Deleting the cache does not remove updates that are already installed. It affects cached files that Windows uses to install or verify future updates.
Deleting the cache won't remove updates you already installed; it only affects future downloads.
Should I delete everything or just the Download folder?
The safest approach is to rename the entire SoftwareDistribution folder and delete the contents later if needed. Deleting selectively can miss files or cause partial issues.
Renaming the whole folder is safer than deleting individual subfolders.
What about macOS or Linux caches?
This guidance specifically targets Windows Update caches. macOS and Linux manage updates differently and have their own cache locations and cleanup steps.
This guide focuses on Windows; other OSes have different cleanup processes.
Do I need to back up before cleanup?
Backing up critical data and, if possible, creating a system restore point reduces risk if cleanup leads to unexpected behavior.
Back up important data and consider a restore point to stay safe.
Watch Video
Top Takeaways
- Stop updates before touching the cache.
- Renaming is safer than deleting for rollback options.
- Reboot and re-check updates after cleanup.
- Backups reduce risk of data loss during maintenance.
- Verify update health post-cleanup to confirm success.