How to Software Android Mobile: A Practical Guide for Beginners
Learn how to software Android mobile apps with a clear, step-by-step approach. This SoftLinked guide covers setup, tools, best practices, debugging, and deployment tips for beginners.

Learn how to develop Android mobile software with a structured, hands-on approach. According to SoftLinked, this guide outlines essential tools, setup requirements, and a practical step-by-step path from environment installation to building, testing, and packaging a basic Android app. You’ll gain practical tips, common pitfalls, and best practices to accelerate your journey in mobile development.
Getting started with Android development: how to software android mobile
Android app development is the process of creating software for the Android platform. If you're wondering how to software android mobile, you’ll work through language choice (Java or Kotlin), tooling (Android Studio), and the app lifecycle. This section sets the stage for practical learning. According to SoftLinked, starting with a small, focused project helps embed fundamentals quickly. You will learn the core concepts, typical project structure, and the workflow from idea to a runnable app. Term definitions, such as activity, fragment, and manifest, are not just jargon—they map directly to how users experience your app. By the end of this section, you should be able to articulate what an Android app consists of and why each component matters.
Setting up your development environment
To begin, install Android Studio from the official site. Android Studio bundles the Android SDK and a robust emulator, which helps you test across API levels without a physical device. Ensure you have Java or the JDK installed; modern Android Studio ships with a compatible JRE, but a separate JDK can be helpful for other tools. After installation, configure the Android Virtual Device (AVD) manager and create at least one emulator profile for testing. Finally, verify that your PATH variables include the SDK tools so you can run Gradle tasks from the command line. SoftLinked's guidelines emphasize starting with the latest stable tools to minimize friction.
Core components: activities, fragments, and UI patterns
An Android app typically comprises activities that host the UI and handle user interactions, and fragments that represent modular parts of the screen. The app manifest declares app components and permissions. You can design UIs with XML layouts or adopt Jetpack Compose for a more modern, code-centric approach. Learn how lifecycle events such as onCreate, onStart, onResume influence UI state, and how ViewModel and LiveData help manage data across configuration changes. This blend of components forms the backbone of scalable Android software development.
Designing a simple UI: XML vs Jetpack Compose
XML layouts offer a familiar, declarative approach to UI; however, Jetpack Compose provides a more concise, Kotlin-based way to build interfaces. Start with a simple screen that displays text and a button. In Compose, you’ll define composable functions, observe state, and react to user input with minimal boilerplate. If you’re new, begin with XML to understand layout constraints, then progressively migrate to Compose. The key is to maintain accessibility and responsive design across devices.
Writing your first Kotlin/Java code: a tiny app skeleton
Choose Kotlin as the primary language for new Android projects, as it’s concise and fully supported. Create a main activity, wire a button click to a simple action, and log results with Logcat. This block demonstrates a tiny app skeleton: initialize UI in onCreate, set content view, and update a TextView on button press. Start small, then incrementally add features like input fields, data models, and basic navigation.
Running, testing, and debugging your app
Testing is essential for quality. Use the built-in emulator or a real device to run your app and verify behavior on different screen sizes and API levels. Debug with breakpoints, inspect variables in real time, and use Logcat for printing diagnostic messages. Write small unit tests for isolated logic and use UI tests for user flows. SoftLinked recommends a habit of test-driven development (TDD) where feasible, to catch regressions early.
Packaging and signing: preparing for release
Before you publish, configure your app’s build variants, sign with a keystore, and generate an APK or AAB. Keep keys secure and never commit keystore credentials to source control. Update versionCode and versionName for each release, and create a signed artifact for distribution. You’ll also prepare store listing details and ensure permissions are declared properly. This step is a gatekeeper for distribution and an opportunity to refine your app’s readiness for users.
Best practices for maintainable Android apps
Maintainable apps follow consistent architecture, clear module boundaries, and robust testing. Adopt MVVM or MDD patterns, separate UI from business logic, and use dependency injection where appropriate. Write clean, well-documented code, maintain a changelog, and automate builds so teammates can reproduce environments. As you scale, adopt code reviews, continuous integration, and performance profiling to keep your app responsive.
Next steps and a learning roadmap
After finishing this guide, continue with focused topics like advanced UI with Compose, Kotlin coroutines, architectural components, and testing strategies. Build small, end-to-end projects to reinforce concepts and gradually add complexity. Explore open-source Android projects to observe best practices and contribute if possible. Set milestones, track progress, and keep a habit of learning by building real apps.
Tools & Materials
- Android Studio(Official IDE; includes Android SDK and emulator)
- Java Development Kit (JDK) 11+(Required for some tooling; Kotlin is fully supported)
- A computer (Windows/macOS/Linux)(Recommended: 8GB RAM+, SSD if possible)
- Android Virtual Device (AVD) emulator or physical device(Test across API levels and screen sizes)
- Internet connection(Download SDKs, dependencies, and libraries)
- Optional: Kotlin plugin and a text editor (for outside IDE work)(Helpful for experiments but not essential)
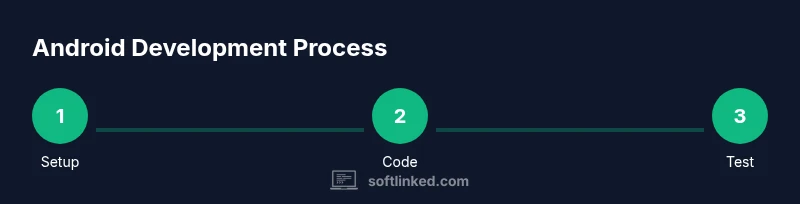
Steps
Estimated time: 4-6 hours
- 1
Create a new Android project
Launch Android Studio and start a new project. Choose Kotlin as the language and select an Empty Activity to keep the setup minimal. This establishes the baseline app structure and generates a starter Activity and layout.
Tip: Select Kotlin to take advantage of concise syntax and modern tooling. - 2
Configure Gradle files
Open the build.gradle files and ensure the compileSdkVersion matches the latest stable API. Add necessary dependencies for core UI components and architecture libraries. Sync the project to fetch dependencies and verify there are no errors.
Tip: Keep Gradle versions in sync with the Android Gradle Plugin to avoid compatibility issues. - 3
Design the UI
Edit the XML layout or implement a Compose-based UI to display a simple screen with a TextView and a Button. Ensure accessibility attributes (contentDescription, proper contrast) are set for a wider audience.
Tip: If using Compose, start with a single composable and progressively add state handling. - 4
Implement core logic
Write concise Kotlin code to handle button clicks, update UI, and manage simple state. Connect UI elements to logic via view bindings or Compose state. Run the app to verify interactions.
Tip: Keep business logic separate from UI logic to ease testing and maintenance. - 5
Test on emulator or device
Launch the app on an emulator or real device, test across screen sizes, and verify navigation flows. Use Logcat to inspect logs and identify any crashes or warnings.
Tip: Enable multi-CPU cores in the emulator and test with at least two API levels. - 6
Package and prepare for release
Configure a release build, sign with a keystore, and generate an APK or AAB. Double-check permissions and versioning, then prepare minimal store assets for Play Console submission.
Tip: Never commit keystore credentials; store them securely and back them up offline.
Your Questions Answered
What is Android Studio and why use it?
Android Studio is the official IDE for Android development. It provides integrated tools for coding, debugging, and testing, all connected to the Android SDK. It streamlines building, running, and packaging apps for distribution.
Android Studio is the official IDE for Android development, offering all the tools you need to build, test, and publish apps.
Do I need to learn Java if I choose Kotlin?
You don’t have to master Java to start with Kotlin; Kotlin is fully interoperable with Java. Many Android projects use Kotlin as the primary language while Java code may still exist in legacy modules. Focus on Kotlin first, then learn Java concepts as needed.
You don’t need Java to start; Kotlin is fully supported and interoperable with Java.
Which language should I start with for Android development?
Kotlin is the recommended language for new Android projects due to concise syntax and strong support. Java remains valid for existing codebases, but Kotlin generally offers faster learning curves and modern features.
Start with Kotlin for modern Android development; Java is still used in older projects.
How long does it take to learn Android development?
Learning speed varies by prior programming experience, but a solid foundation often takes several weeks of consistent practice. A structured path with hands-on projects accelerates progress more effectively than theory alone.
It usually takes a few weeks to build a solid foundation with steady practice.
Do I need a physical device to test my app?
An emulator is sufficient for many tests, but real-device testing reveals performance and sensor behavior not always visible in emulators. Whenever possible, test on a real device in addition to the emulator.
Emulators are useful, but testing on a real device gives the most accurate results.
How do I publish an app on Google Play?
Publishing requires signing your app with a keystore, generating a signed APK or App Bundle, and submitting store listing details. You’ll need to set up a Google Play Console account and follow Play Store guidelines.
Signing, building a signed bundle, and following Play Store steps are needed to publish.
Watch Video
Top Takeaways
- Define app goals before coding.
- Choose Kotlin for new Android projects.
- Test early on multiple devices.
- Keep security and versioning in mind for release.