How to Install Software on Mac: A Comprehensive Step-by-Step Guide
Learn how to install software on Mac with a clear, step-by-step guide. From App Store installs to manual DMG setups, SoftLinked explains safe, reliable macOS methods.

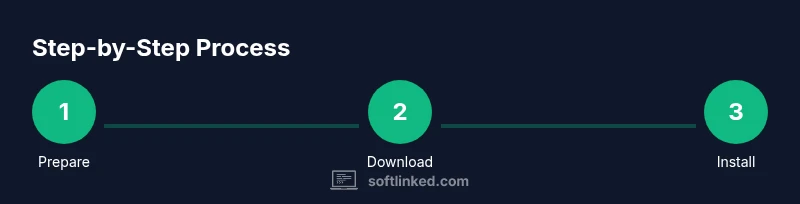
This guide shows you how to install software on a Mac using App Store, official downloads, or trusted package managers. You’ll learn how to verify downloads, handle DMG and PKG installers, and complete post-install steps like permissions and updates. By the end, you’ll install apps confidently and safely. This article also covers troubleshooting and common pitfalls.
Why macOS installation workflows differ
macOS handles software installation differently from other operating systems, emphasizing signed apps, sandboxing, and Gatekeeper checks. When you install software on Mac, you often choose between the App Store, official website downloads, or package managers. This approach reduces risk by guiding you to trusted sources and verifying the integrity of installers. According to SoftLinked, starting with reputable sources and understanding macOS's security features helps prevent malware and system instability. The first step is to confirm compatibility with your macOS version and hardware. If you're upgrading an older Mac, check minimum OS requirements and memory usage. In practice, you may see DMG disk images, PKG installers, or App Store apps; each path has nuances, such as where the app is stored, how binaries are signed, and what permissions installers request. Understanding these differences helps you pick the safest installation path for your needs.
Key terms to know include DMG (disk image), PKG (installer package), Gatekeeper (macOS security feature), and sandboxing (restricting app access). As you gain experience, you’ll recognize trusted publishers and verify signatures, which reduces risk dramatically. This section sets the foundation for safer and more efficient installations, whether you’re a student, a developer, or a professional.
App Store vs. direct downloads: Pros and cons
Choosing between the App Store and direct downloads shapes your installation experience. App Store apps are generally safer, sandboxed, and come with automatic updates, but they may not cover every tool you need. Direct downloads from publishers offer broader software options, faster access to beta features, and more customization options, yet they require you to vet sources, confirm integrity, and manage updates manually. SoftLinked’s guide emphasizes starting with the App Store when possible for streamlined security and support. If you must use direct downloads, prefer publishers with clear reputations, valid digital signatures, and links from official sites. Always back up before major installs and consider enabling macOS Gatekeeper to warn you about untrusted apps. This dual-path approach gives you flexibility without sacrificing safety.
Safe download habits: verifying sources, signatures, and permissions
A safe installation begins long before you run an installer. Verify the source by visiting the publisher’s official site or the App Store listing. Check the domain, ensure HTTPS, and avoid links in emails or pop-ups. For downloaded apps, verify any available digital signatures or checksum files (SHA-256) provided by the publisher. Gatekeeper should prompt you to approve or reject the installer; if it blocks an app, reconsider its legitimacy. When an installer requests permissions (such as Full Disk Access or Accessibility), review why these permissions are needed and grant only what’s essential. If something feels off, stop and research. SoftLinked’s approach recommends a cautious, source-first workflow to reduce malware risk and maintain system integrity.
Installing apps from DMG or PKG: step-by-step guidance
Most macOS installations come as either a DMG or PKG file. For DMG: mount the disk image, drag the app into the Applications folder, and eject the disk image when finished. For PKG: run the installer and follow the on-screen prompts, selecting any optional components carefully. After installation, remove the installer file to save disk space and run the app from Applications. If you encounter permission prompts, enter your admin password to authorize changes. This path often yields clean, well-signed installations with straightforward updates.
Using Homebrew and package managers on Mac
Homebrew is a popular package manager that simplifies installing CLI tools and GUI apps via Homebrew Cask. First install Homebrew from the official site, then use commands like brew install for CLI tools or brew install --cask for applications. Package managers can streamline updates and ensure consistency across multiple Macs in a learning or work environment. When using Homebrew, verify that the taps (repositories) are reputable and avoid installing untrusted tap formulas. Package managers are powerful, but they require occasional maintenance and knowledge of dependencies.
Troubleshooting common installation issues
If an installer fails, start with basic checks: confirm macOS compatibility, sufficient disk space, and network stability. Gatekeeper rejections often indicate an untrusted publisher; in this case, re-check the source and consider using App Store equivalents. If an app launches but behaves erratically, ensure you’re using the latest version and that macOS security settings are not overly restrictive. Sometimes, permission-related errors require running the installer again with an admin password or adjusting Privacy & Security settings. Keep calm, document the error, and search for the exact message in trusted developer resources.
Post-install best practices: updates, security, and cleanup
After installation, enable automatic updates where possible to minimize vulnerabilities. Verify that the app receives security patches and that macOS remains up to date. Clean up by removing installer files and older DMGs, and periodically review permissions granted to apps in System Settings. If you rely on multiple apps for development or study, maintain a backup strategy (Time Machine or cloud backups) to protect your data. By keeping software current and removing unnecessary files, you reduce risk and improve overall system performance.
Tools & Materials
- Mac computer running macOS 10.15+(Ensure your device meets minimum OS requirements)
- Active Internet connection(Needed for downloads, checksums, and updates)
- Admin username and password(Required to authorize installations and changes)
- Official installer file or App Store access(DMG, PKG, or App Store entry from a trusted source)
- Verified publisher/source(Avoid untrusted mirrors; verify domain and publisher)
- Backup solution (Time Machine or similar)(Recommended before major installations)
Steps
Estimated time: 30-60 minutes
- 1
Assess the software source
Determine whether the app is from the App Store or a publisher's official site. Check compatibility with your macOS version and hardware. This helps you choose the safest installation path from the start.
Tip: Prefer App Store when possible for automatic updates and sandboxing. - 2
Download from a trusted source
Download the installer from the App Store or the publisher's official site. If you’re using direct downloads, verify the URL and avoid third-party mirrors.
Tip: Hover over links to reveal the true domain; ensure it matches the publisher. - 3
Open the installer and grant permissions
For DMG, mount and drag the app to Applications. For PKG, run the installer and follow prompts. Enter admin credentials when prompted.
Tip: Only grant permissions that are clearly required by the installer. - 4
Complete the installation wizard
Follow on-screen prompts, choose install location when offered, and deselect optional components if you don’t need them.
Tip: Review terms and privacy notices before agreeing. - 5
Verify and first-run
Launch the app from Applications and confirm it starts correctly. Check for initial setup steps and required permissions.
Tip: If the app requests too many permissions, reassess its necessity. - 6
Update and secure the app
Check for updates, enable automatic updates if available, and maintain macOS security settings.
Tip: Keep both macOS and installed apps up to date to reduce risks.
Your Questions Answered
What is the best way to install software on a Mac?
The App Store is typically the safest and easiest route, offering sandboxing and automatic updates. For non-Store apps, verify publisher reputation, use official sources, and enable Gatekeeper.
The App Store is usually the simplest and safest route. If you use non-Store apps, make sure the publisher is reputable and Gatekeeper is enabled.
How do I know if a download is legitimate?
Check the publisher, domain, and any available digital signatures or checksums. Use official channels and avoid suspicious prompts.
Look at who published it, verify the domain, and rely on digital signatures or checksums when provided.
Can I install apps without admin rights?
Some per-user apps or App Store installations may not require admin rights, but many full installers will. If admin access is denied, seek alternatives from the publisher or your admin.
Often you’ll need admin rights for full installations, but some store apps can install without them.
What should I do if an installer asks for weird permissions?
Cancel and research the app. Verify the need for each permission and avoid granting access beyond what’s essential.
If an installer asks for odd permissions, stop and investigate why those permissions are needed.
How can I uninstall apps later on Mac?
Most apps can be removed by dragging from Applications to Trash. Some apps provide their own uninstaller. Always back up before removal.
Drag the app to Trash or use its uninstaller if provided. Back up first.
Watch Video
Top Takeaways
- Choose App Store when possible for safety and updates
- Always verify the download source before installing
- Follow the installer prompts and review permissions
- Keep macOS and apps updated for security
- Back up data before adding new software