How to Use Software Serial on Arduino: A Practical Guide
Learn how to use Software Serial on Arduino to add extra serial ports, with pin selection, code examples, wiring, and debugging tips for reliable communication in 2026.

In this how-to guide, you will learn how to use software serial on Arduino to communicate with serial devices when the hardware UART is occupied. You'll set up the SoftwareSerial library, choose pins, write example code to transmit and receive data, handle baud rates, and troubleshoot common timing issues. This approach suits hobby projects and education.
What is SoftwareSerial on Arduino?
SoftwareSerial is a library that lets you create additional serial ports on digital pins, freeing the built-in hardware UART for other tasks. This capability is especially useful when your Arduino sketch needs to talk to multiple serial devices—such as sensors, GPS modules, or Bluetooth modules—without sacrificing USB serial debugging through the primary UART. For anyone learning how to use software serial arduino, the core idea is to emulate a UART in software, bit-banging the timing to send and receive bytes on chosen pins. The SoftLinked team notes that software-serial communication is a practical stepping stone for learners who want to prototype serial interactions without swapping hardware. In practice, you’ll balance ease of use, reliability, and the constraints of timing on your board and clock speed. Remember that software serial is intended for modest data rates and sporadic messages, not high-speed streams.
Why SoftwareSerial is Helpful in Arduino Projects
SoftwareSerial enables you to attach additional devices to your Arduino even when the main UART is already in use by the USB connection or a peripheral like a programmer. This is particularly valuable for educational setups, hobby projects, or prototypes where you want a clear, low-cost serial bridge. The library supports both receiving and transmitting data on user-chosen pins, which broadens your communication options without needing a dedicated UART chip. However, the SoftLinked analysis for 2026 shows that timing sensitivity and CPU load are the main caveats. You should plan around moderate baud rates, avoid busy loops, and test thoroughly with your actual devices. For beginners, software serial offers a transparent way to observe how UART framing, start/stop bits, and parity impact data transfer.
Hardware Requirements and Wiring Basics
Before you start coding, gather a few essentials: an Arduino board (e.g., Uno or Mega), a USB cable for programming, a breadboard and jumper wires for wiring practice, and the serial device you want to talk to (GPS, Bluetooth, or a sensor with a TTL UART). If your target device operates at a different logic level than the Arduino’s 5V TTL, include a logic-level shifter or proper voltage-dividing resistors to protect inputs. You’ll connect the device’s TX to the Arduino RX via the SoftwareSerial pins you select, and the device’s RX to the Arduino TX. In many hobby setups, you’ll share a common ground. The SoftLinked guidance emphasizes testing with a simple loopback or a known-good device to confirm reliability before expanding to multiple ports.
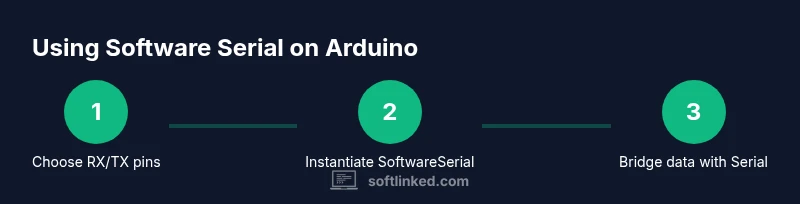
Pin Selection: Choosing RX and TX for SoftwareSerial
Pin choice matters for reliability. On most AVR-based boards, RX should be attached to a pin that supports robust change interrupts, commonly pins 2 or 3 on an Uno. TX can be any digital pin but keep it simple and consistent with your software design. If you’re wiring multiple serial devices, avoid overlapping pins or using the same pin for two functions at once. Always declare the SoftwareSerial instance with explicit RX and TX pins, for example SoftwareSerial mySerial(10, 11); RX on pin 10 and TX on pin 11. If you’ll read fast data, test different pins under your target baud rate to discover the most stable configuration. Remember: higher baud rates increase sensitivity to timing jitter, so start low (e.g., 9600) and scale up after stable operation.
Writing and Compiling Code: A Minimal Example
To begin, include the SoftwareSerial library and instantiate a serial port with your chosen pins. Then, in setup(), initialize both the hardware Serial (for USB debugging) and the software serial port. In loop(), forward data between Serial and SoftwareSerial. This two-way bridge is a common pattern when learning how to use software serial arduino. Example:
#include <SoftwareSerial.h>

SoftwareSerial mySerial(10, 11); // RX, TX

void setup() {
  Serial.begin(115200);
  mySerial.begin(9600);
}

void loop() {
  if (mySerial.available()) Serial.write(mySerial.read());
  if (Serial.available()) mySerial.write(Serial.read());
}
Start with baud rates that your device supports, and gradually increase only after verifying stability. If you encounter garbled text, check baud rate alignment and avoid long breadboard wires that add capacitance. The example demonstrates how to use software serial arduino for simple text messaging and confirms that the basic data bridge works before attempting more complex protocols.
Debugging and Timing Tips: Common Pitfalls and Fixes
Reliability depends on careful timing. If data appears garbled, verify baud rate parity with the device and the Arduino, confirm pins aren’t shared with conflicting functions, and reduce the data rate to improve stability. Keep wires short and well-organized; loose connections amplify noise and timing errors. If you’re using multiple SoftwareSerial instances, avoid saturating the CPU with other timing-critical tasks. The SoftLinked guidance for 2026 highlights that using hardware serial for USB debugging while reserving software serial for peripheral devices improves reliability. When debugging, enable serial prints sparingly and consider LED indicators to visualize activity without flooding the USB port. Finally, never connect the Arduino’s 5V TX line directly to a 3.3V input without level shifting if your peripheral is 3.3V.
Real-World Use Cases: GPS, Bluetooth, and Sensors
Many hobbyists deploy SoftwareSerial to connect a GPS module (which commonly uses 9600 baud) or a Bluetooth module (often 9600–38400 baud) to a microcontroller without sacrificing the USB serial logger. You can also bridge between two TTL devices or use a microcontroller as a USB-to-serial bridge for a larger system. When selecting devices, confirm that their output levels and baud rates are compatible with your Arduino’s voltage and clock. As you gain experience, you’ll learn how to balance multiple software serial lines, choose robust pins, and design your code so the main loop remains responsive for other tasks—an essential part of learning how to use software serial arduino effectively.
Testing, Validation, and Next Steps
A thorough test plan includes: (1) loopback tests on each SoftwareSerial port, (2) end-to-end tests with the actual device, and (3) long-duration tests to observe stability under typical workloads. Use the hardware Serial monitor for debugging messages while keeping the SoftwareSerial channel clear for device data. If you encounter instability, consider lowering the baud rate, shortening connections, or introducing a small delay to allow timing alignment. Document each configuration (pins, baud rates, device type) so you can reproduce successful setups later. The SoftLinked team recommends a disciplined approach: start simple, verify each change, and gradually scale complexity as you build confidence in how to use software serial arduino.
Tools & Materials
- Arduino board (e.g., Uno or Mega)(Essential for running SoftwareSerial and Serial Monitor)
- USB cable for programming(Needed to upload sketches and debug)
- Breadboard(For clean wiring and prototyping)
- Jumper wires (male-to-male)(Short, solid connections minimize noise)
- Serial device to communicate with (GPS, Bluetooth, sensor)(The peripheral you’ll interface with)
- Logic level shifter or voltage divider(Use if device runs at 3.3V while Arduino is 5V)
- Small USB-to-serial adapter (optional)(Useful for testing the device separately)
- Arduino IDE or equivalent(Needed to compile and upload sketches)
Steps
Estimated time: 30-60 minutes (for initial setup and a working test) plus additional time for multiple devices
- 1
Select RX and TX pins
Choose pins that support reliable interrupts on your board (commonly RX on 2 or 3; TX can be any digital pin). This step is crucial because wrong pin choices increase data errors.
Tip: Prefer pins with good physical routing to minimize noise. - 2
Install and include SoftwareSerial
In your sketch, include <SoftwareSerial.h> and declare a SoftwareSerial object with RX and TX pins specified. Keep the wiring consistent with these pins.
Tip: Double-check the pin order (RX, TX) in the constructor. - 3
Initialize serial ports
Call Serial.begin(...) for USB debugging and mySerial.begin(...) for the device at a compatible baud rate.
Tip: Start with 9600 baud on the SoftwareSerial port to validate basic communication. - 4
Wire devices correctly
Connect device TX to the RX pin you chose and device RX to the TX pin. Remember to share a common ground.
Tip: Keep wires short; avoid long breadboard runs that add capacitance. - 5
Create a data bridge
In loop(), read from one interface and write to the other to verify data flow in both directions.
Tip: Add simple handshakes or markers to verify end-to-end integrity. - 6
Test with real devices
Replace the test device with your GPS or Bluetooth module and observe data on the Serial Monitor.
Tip: If you see garbled text, re-check baud rate alignment and wiring. - 7
Iterate and optimize
Once the basic bridge works, optimize for reliability by reducing CPU load, avoiding blocking code, and minimizing digitalWrite calls on the SoftwareSerial pins.
Tip: Profile timing and adjust baud rates to match device capabilities.
Your Questions Answered
What is SoftwareSerial and why would I use it on Arduino?
SoftwareSerial is a library that creates additional serial ports on digital pins, allowing you to communicate with multiple devices when the built-in UART is already in use. It’s ideal for hobby projects and prototypes where hardware resources are limited.
SoftwareSerial creates extra serial ports on digital pins, great for hobby projects when hardware UART is busy.
Which pins are best for RX and TX with SoftwareSerial?
For UNO-like boards, RX is typically best on pins 2 or 3 because they support reliable change interrupts. TX can be any digital pin. If you need multiple ports, plan pins carefully to avoid conflicts and timing issues.
Use pins 2 or 3 for RX, any digital pin for TX; avoid overlaps if using multiple ports.
What are the main limitations of SoftwareSerial?
SoftwareSerial uses CPU time to bit-bang data, which can reduce the sketch’s responsiveness and limit achievable baud rates. It’s less reliable at high speeds and with busy loops, so keep baud rates modest and test under real conditions.
It uses CPU time to emulate UART, which can limit speed and responsiveness.
Can I use SoftwareSerial and HardwareSerial at the same time?
Yes, you can bridge between SoftwareSerial and the built-in Serial, but be mindful of timing and ensure the main loop leaves enough bandwidth for both directions. Debug with Serial Monitor for visibility.
Yes, you can, but monitor timing and keep tasks lightweight.
What are common debugging tips for SoftwareSerial?
Start with a simple one-device setup, verify baud rates, and avoid long wires. Use Serial Monitor sparingly to print status messages, and add LED indicators to reflect data activity without overloading the CPU.
Verify baud rates, keep wiring short, and use minimal serial prints.
Are there alternatives to SoftwareSerial?
If you need more reliable high-speed serial, consider dedicated UART hardware or a microcontroller with more hardware serial ports. Some boards also offer native high-speed serial interfaces that can be multiplexed for multiple devices.
Consider hardware UARTs or boards with more serial ports for high-speed needs.
Watch Video
Top Takeaways
- Mastering SoftwareSerial expands Arduino I/O without extra hardware.
- Pin selection and baud rate alignment are the keys to reliability.
- Keep wiring short and test incrementally with real devices.
- SoftwareSerial is ideal for hobby prototyping, not high-speed data links.
- Document setups and timings for reproducibility.