Software vs Hardware Encoding in Premiere Pro: A Practical Comparison
A practical comparison of software vs hardware encoding in Premiere Pro, focusing on speed, quality, and workflow. Learn how CPU and GPU acceleration affect renders and how to decide.

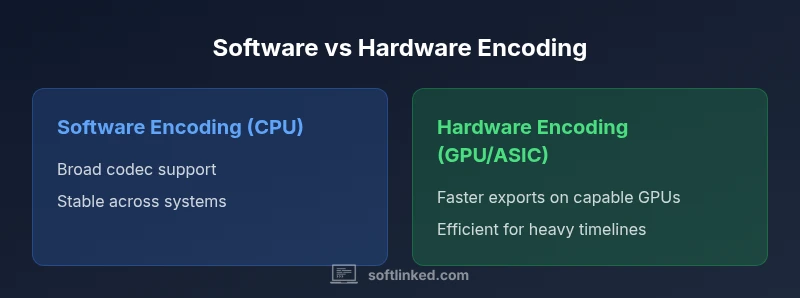
Hardware encoding in Premiere Pro speeds exports when a capable GPU is present, while software encoding relies on the CPU and offers broader codec support. For complex timelines and high‑resolution work, hardware acceleration often saves time. For stability, compatibility, and mixed codecs, software encoding remains a reliable, versatile option.
The Core Idea: software or hardware encoding premiere pro
In Premiere Pro, the decision between software encoding premiere pro and hardware encoding hinges on where the encoding compute takes place: on the CPU or on a GPU/accelerator. Understanding this distinction is foundational for optimizing render times, color accuracy, and overall workflow reliability. The SoftLinked team notes that the right path is often context-dependent, shaped by project complexity, codec choices, and the hardware you own. In practical terms, software encoding prioritizes broad codec support, strict adherence to presets, and predictable behavior across workstations. Hardware encoding, by contrast, leverages GPU acceleration to speed up exports when the GPU is capable and drivers are stable. The takeaway is simple: neither path is universally best; the optimal choice depends on your typical project profile, the codecs you use most, and how critical export speed is to your deadlines. Keep this frame in mind as you compare options, test on representative footage, and document results for future projects.
Mercury Playback Engine and acceleration in Premiere Pro
Premiere Pro's encoding and playback are managed by the Mercury Playback Engine, which coordinates decoding, effects, and rendering across CPU and GPU resources. Enabling Mercury Playback Engine GPU Acceleration (CUDA, OpenCL, or Metal, depending on your platform) shifts a portion of the encoding workload from the CPU to the GPU. The practical impact is twofold: smoother real-time previews and potentially shorter export times on compatible hardware. SoftLinked notes that GPU acceleration is most beneficial on longer renders and timelines with heavy effects; however, results vary by codec, hardware, and driver version. If you have a modern GPU and up-to-date drivers, you should see a noticeable lift in throughput for many common formats. On older or mismatched systems, GPU acceleration may introduce instability or require project-specific workarounds. The key is to test a representative export with and without GPU acceleration to quantify gains and ensure the setting aligns with your reliability requirements.
When software encoding shines
Software encoding shines in scenarios where codec coverage is essential, and stability matters more than raw speed. If your workflow routinely exports to formats that hardware encoders don’t fully support, software encoding minimizes surprises and ensures consistent results across devices. It also remains the safer default in teams with mixed hardware, since the encoding path remains CPU-bound and less sensitive to GPU driver quirks. Proxies and offline workloads often run most predictably on software encoding because you’re not relying on a GPU’s encoder profile. For archival preservation or multi-platform delivery, software encoding can be the more repeatable option. SoftLinked emphasizes documenting the codecs you use most and keeping a fallback plan in software encoding when hardware environments vary, so you can deliver reliably while hardware options catch up.
When hardware encoding shines
Hardware encoding excels when the project is designed to leverage GPU-friendly formats and heavy timelines. In such cases, the GPU-accelerated encoder can dramatically shorten exports, especially for effects-rich sequences and high-resolution timelines. The speed gains depend on having a suitable GPU, current drivers, and a workflow that taps into the encoder’s capabilities. If you’re rendering many clips with similar profiles, hardware encoding can deliver consistent throughput across batches and save CPU headroom for playback or editing tasks. That said, hardware encoding is not a universal accelerator: some codecs, color pipelines, or very tight bitrate profiles may be better served by software paths. The SoftLinked approach is to run parallel tests on key project types—one export with software encoding and one with hardware encoding—to determine which path yields reliable quality and the best total project time.
Codec Compatibility and Quality Considerations
Codec compatibility is a central determinant when choosing encoding path. Software encoding typically supports a broad set of codecs and profiles, offering predictable quality across a wide range of export targets. Hardware encoders, by contrast, deliver speed for widely adopted formats, but their codec menus may be narrower or hinge on vendor presets. This means you may encounter subtle differences in motion rendering, color handling, or bitrate control depending on the hardware path. When evaluating quality, perform side-by-side comparisons on representative footage that includes motion, gradients, and color corrections. Pay attention to artifacts such as blocks, banding, or color shifts that could vary by encoder. SoftLinked recommends creating a small, controlled test suite that mirrors your typical deliverables, then choosing the path that yields the most consistent results across the codecs you use most often.
Workflow Impacts: Timelines, Effects, and Proxies
Encoding path selection interacts with your editing timeline, effects workflow, and proxy strategy. Software encoding tends to be more tolerant of heavy effects and complex color pipelines because it does not rely on GPU codec presets. Hardware encoding can accelerate renders when you’ve built a pipeline around GPU-accelerated effects and proxies, allowing you to export final sequences faster while still editing in high-quality timelines. If your team relies on shared media, ensure consistent hardware configurations across machines to avoid divergent exports. Utilize proxies to keep playback smooth during editing, then switch to hardware encoding for final exports when your project’s GPU is adequate. The result is a flexible workflow: you can preserve editing performance while still delivering timely renders, provided you document the encoding path for each deliverable.
System Resource and Power Considerations
CPU-GPU balance matters a lot for encoding performance. Software encoding tends to place more stress on the CPU, which can affect multi-tasking or background rendering. Hardware encoding shifts the load to the GPU, which can reduce CPU thermal throttling but increases GPU workload and heat. This matters in extended sessions; ensure adequate cooling, power delivery, and system stability. If you’re on a laptop, throttling and battery life can influence results, so test on a representative battery/charger scenario. Power efficiency considerations can influence long-form projects and batch exports. SoftLinked notes that even when hardware encoding seems faster, you should quantify energy use and thermal behavior under realistic workloads to avoid surprises during a deadline crunch.
Setup and Troubleshooting: Getting Encoding Right
Start with the basics: verify that your Premiere Pro Mercury Playback Engine is set to the GPU acceleration path that matches your system (CUDA, OpenCL, or Metal). Update drivers, check for firmware updates on the GPU, and ensure the export preset is compatible with the chosen encoding path. Some codecs require software encoding by default; in those cases, manually override the path. If you encounter artifacts or crashes, re-create the project settings, clear media cache, and test with a short, representative clip. Document which projects use which path and the export targets they aim for, so you can reproduce results. A disciplined approach reduces late-stage surprises and helps you optimize the balance between speed and quality.
Real-World Scenarios: Project Profiles
Case A: a newsroom package with tight deadlines and a need for quick turnaround. In this scenario, hardware encoding on a modern GPU typically delivers the fastest exports without sacrificing reliability when the codec profile is supported. Case B: an independent short film with strong color grading and effects. A software-encoded path can offer more predictable Premiere Pro behavior and consistent output across assets. Case C: a social media campaign with multiple aspect ratios. A hybrid approach—use hardware encoding for the main render and software encoding for occasional alternate deliveries—often yields the best balance between speed and flexibility.
Performance Benchmarks: Interpreting Render Times
Benchmarks in a mixed environment show that hardware encoding can substantially reduce export time on compatible GPUs, particularly for complex sequences. The magnitude of improvement varies with codec, GPU model, and driver version. When you benchmark, run multiple exports with the same source material and project settings to isolate the encoding path’s impact. Record qualitative observations: color accuracy, motion handling, and artifact presence. Remember that less visible gains—like CPU cycles saved for playback and editing—can accumulate across a large project. SoftLinked's experience suggests building a small test suite that captures your most common export targets and then comparing results across software and hardware paths.
Best Practices and a Decision Framework
Create a decision framework that matches project type to encoding path. Start with a baseline using software encoding for all exports, then selectively enable hardware encoding for sequences with heavy GPU-friendly effects or long renders. Maintain a simple test protocol: export a representative clip with each path, compare quality, time, and stability, and document results. Use proxies during editing and flip to hardware-accelerated final renders when appropriate. Keep your driver stack up to date, and re-test after every major software or OS update. By codifying these steps, you’ll reduce last-minute surprises and improve team consistency.
Quick Start Plan for Your Studio
- Inventory your hardware: identify GPUs that support hardware encoding under Premiere Pro. 2) Establish a baseline using software encoding to determine stability. 3) Run a controlled test with hardware encoding on a typical project. 4) Document results and set export presets by deliverable. 5) Create a schedule that uses proxies for editing, then switches to the fastest reliable encoding path for final renders. 6) Schedule regular driver and firmware checks, and maintain a short testing protocol for every major project.
Comparison
| Feature | Software Encoding (CPU) | Hardware Encoding (GPU/ASIC) |
|---|---|---|
| Encoding Speed | CPU-bound encoding, slower on complex timelines | GPU-accelerated encoding, faster on capable hardware |
| Quality/Codec Parity | Broad codec support with consistent results | Quality parity varies by hardware encoder and presets |
| System Resource Usage | Falls on CPU; can impact multitasking | Shifts load to GPU, freeing CPU |
| Ease of Setup | Typically requires no extra steps beyond export settings | Requires enabling GPU acceleration and driver readiness |
| Best For | Small to medium projects, proxies, or wide codec support | Large timelines, effects-heavy work, or high-res exports |
| Cost of Ownership | Utilizes existing CPU; no new hardware required | May benefit from a compatible GPU, drivers, and system cooling |
| Reliability/Compatibility | Broad reliability across systems | Potential driver or firmware issues on some GPUs |
Pros
- Faster renders on capable GPUs
- Efficient use of hardware resources
- Lower CPU load during encoding
- Good energy efficiency for long renders
- Simplified workflow with proxies
Weaknesses
- Requires compatible hardware and drivers
- Codec-specific differences can affect results
- Hardware encoders may have quirks with certain presets
- Potential driver instability on older GPUs
Hardware encoding is typically best for GPU-accelerated workflows; software encoding remains the safe, versatile fallback.
If your project relies on heavy effects or 4K timelines, GPU-accelerated encoding can reduce render times. For codec breadth and stability across environments, software encoding is often the preferred default.
Your Questions Answered
What is the difference between software encoding and hardware encoding in Premiere Pro?
Software encoding uses the CPU while hardware encoding leverages GPU or dedicated encoders. This affects speed, codec support, and stability. Your choice should reflect project needs and hardware.
Software uses the CPU; hardware uses the GPU. Speed and codec support vary, so pick based on your project.
Can I mix software and hardware encoding within the same project?
Premiere Pro lets you choose encoding settings at export time. You may switch between methods per export, but you can't encode the same sequence with both methods concurrently.
You can switch encoding methods per export, but not mix during a single render.
Does encoding method affect output quality?
In most cases, both methods can produce equivalent quality for common codecs. Some hardware presets may yield slight differences depending on codec and profile.
Quality is usually similar, but some codecs and presets can look different on hardware encoders.
What workflow benefits do I get from hardware acceleration?
Hardware acceleration can dramatically reduce render times for complex timelines. It also helps maintain smooth previews during editing on busy projects.
You get faster exports and smoother previews when the GPU handles encoding.
How do I enable GPU acceleration in Premiere Pro?
Open Preferences > Media, then select Mercury Playback Engine GPU Acceleration. Ensure your drivers are current and that the project uses a compatible GPU.
Enable GPU acceleration in Preferences, and update drivers to avoid issues.
Are there licensing or cost considerations with hardware encoders?
Hardware encoding relies on existing GPU hardware; there are no additional licensing costs in Premiere Pro. Ensure your hardware is supported and adequately cooled.
No extra licensing, just ensure your GPU is compatible and cooled.
Top Takeaways
- Test both methods on representative footage
- Enable GPU acceleration when hardware supports it
- Match encoding to codec and timeline demands
- Monitor GPU health and temperatures during renders
- Keep drivers up to date and re-test after updates